Carrd Tutorial for beginner. Create an Aesthetic Carrd from scratch
 By David Nge | Last Updated: January 04, 2026
My work is supported by affiliate commissions. Learn More
By David Nge | Last Updated: January 04, 2026
My work is supported by affiliate commissions. Learn More
In this tutorial we're going to re-create the Aesthetic Anime Carrd template from scratch.
This is a beginner-friendly, step-by-step tutorial so even you should do just fine even if you have limited experience with Carrd.
You can follow this tutorial with a free Carrd account.
Although, if you ever need to create more than 3 Carrd websites then the Pro plan actually offers incredible value.
Here's a detailed comparison of all Carrd's Pro plans to help you determine which one is the best.
Now, onto the tutorial.
P.S If you're stuck in the midst of this tutorial you can always check out the template.
Let's create a new Carrd website. Login to the dashboard and click New Site. From there, select the box icon to start from scratch (i.e without using an existing template).
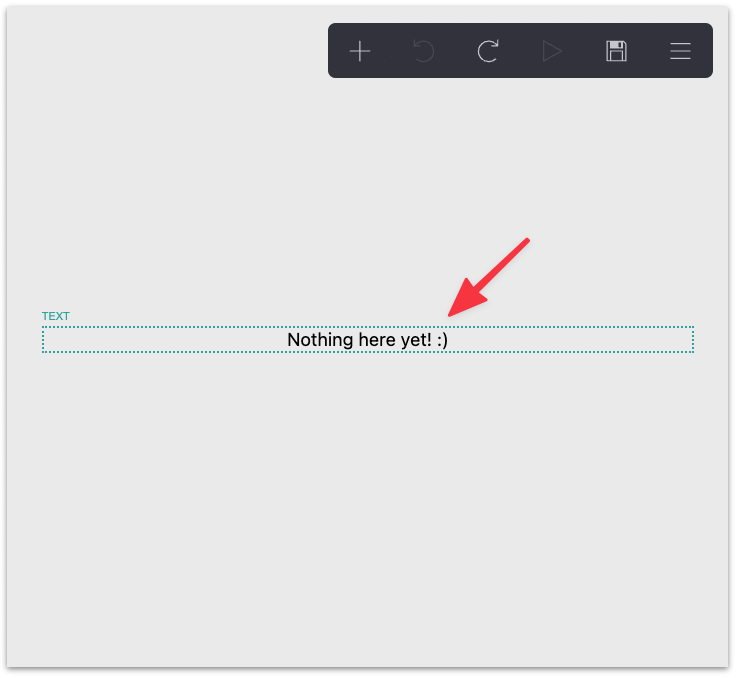
In the main editor, click on the Text element and trash it :)
You can find the trash icon in the bottom left after clicking the text element.
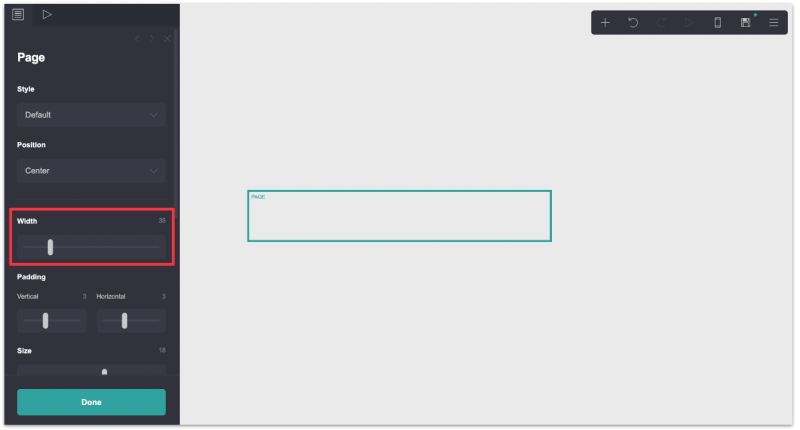
Set the Page width to 35.
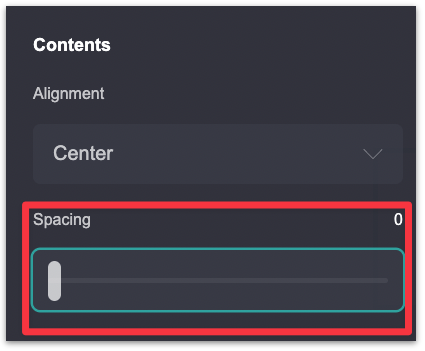
Then scroll down to the Content section and set the spacing to 0.
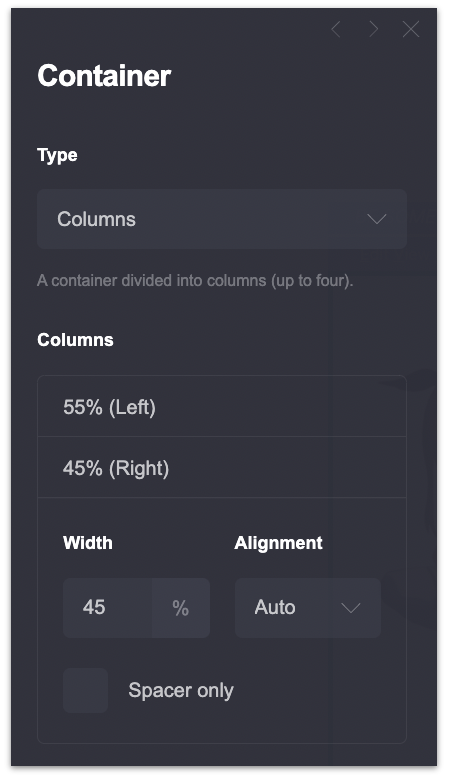
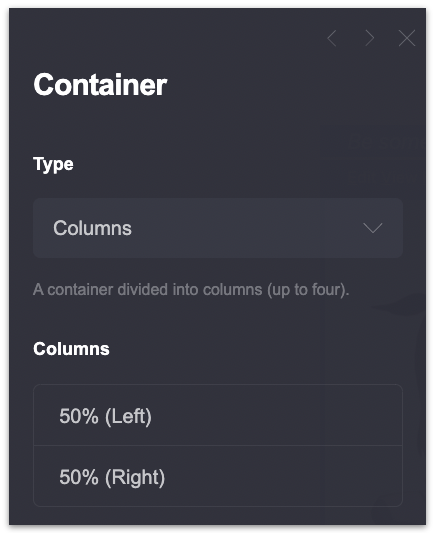
Add a Container element and set the Type to Columns. Both columns should have equal distribution (50%).


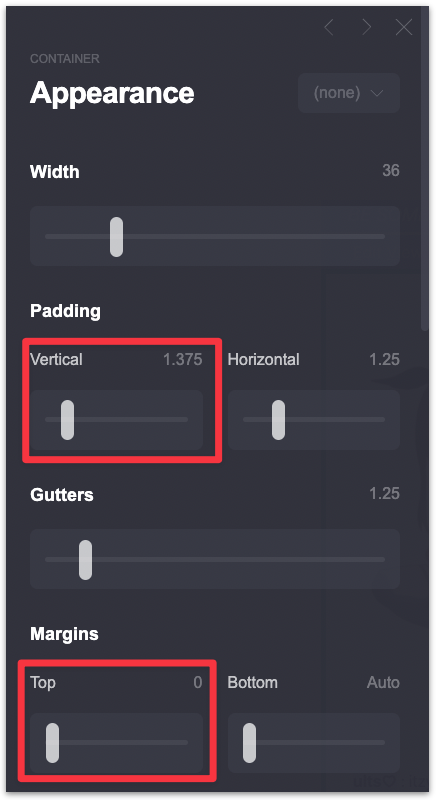
In the same container, head over to the Appearance setting and adjust the container's Width, Padding, and the Gutters.

You won't see much changes at this point but you will soon :)
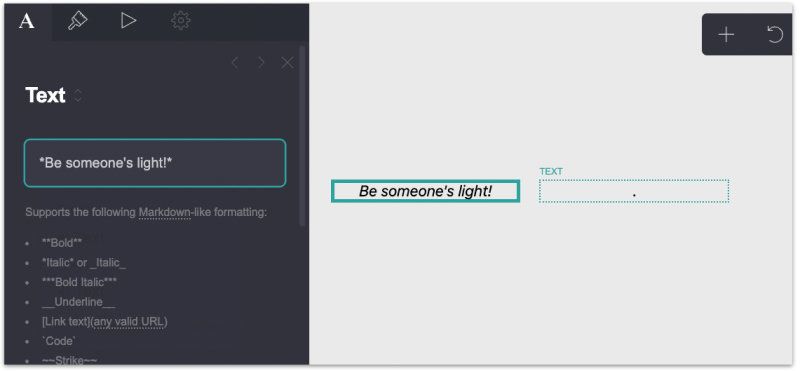
Add 2 Text elements. One for each of the columns in the container you just created.
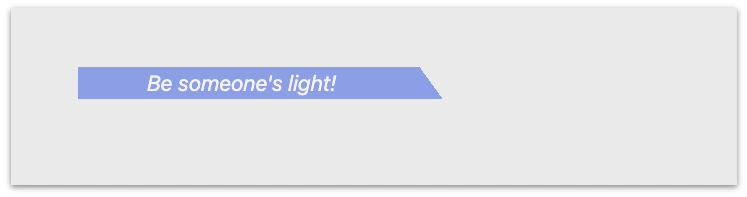
In the first column, add the header text and set the Alignment to Left.
Text to copy:
*Be someone's light!*
In the second column, add a full stop (".")
To create the header in the shape of a trapezium, we need to update the of the container again.
Click on the Container and head to the Appearance tab.
Scroll down to the Background section and update the following setting:
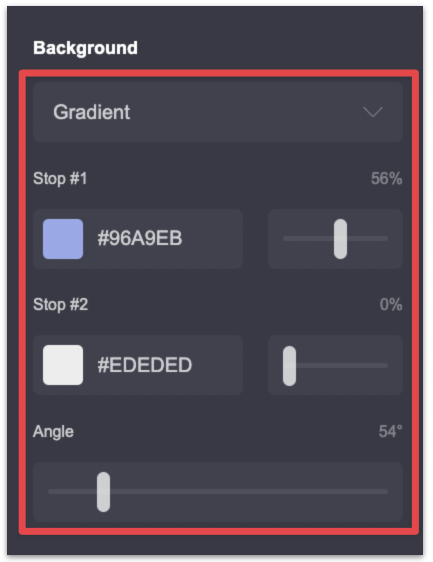
Important note: Stop #2 must be set to 0% in order to create the trapezium. You can change the rest of the settings based on your preference.
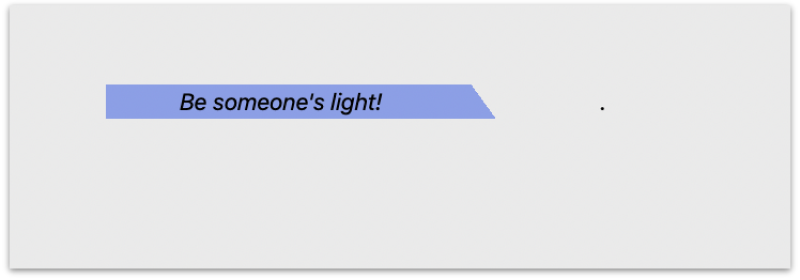
At this point you should have something like this:
You've created the header. Now update the text colour so it looks like the initial design.

By changing the texts to a light colour, you've now completed the header!
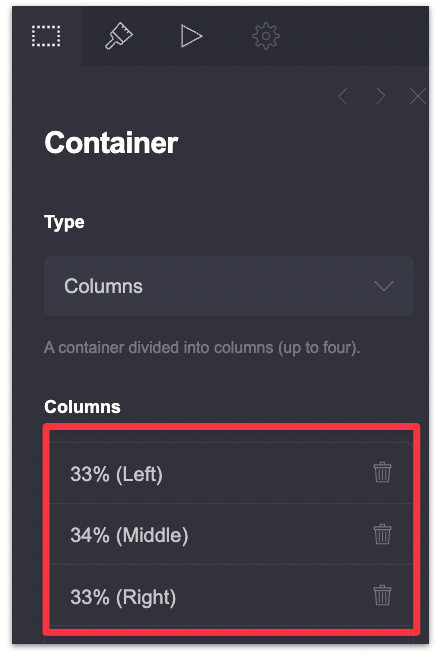
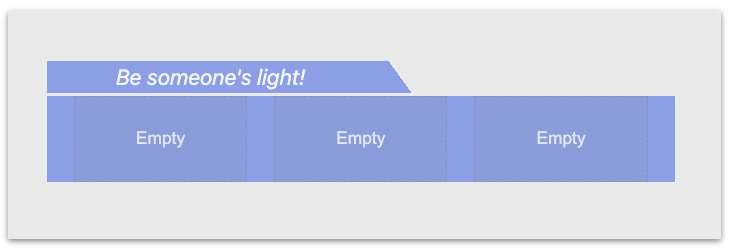
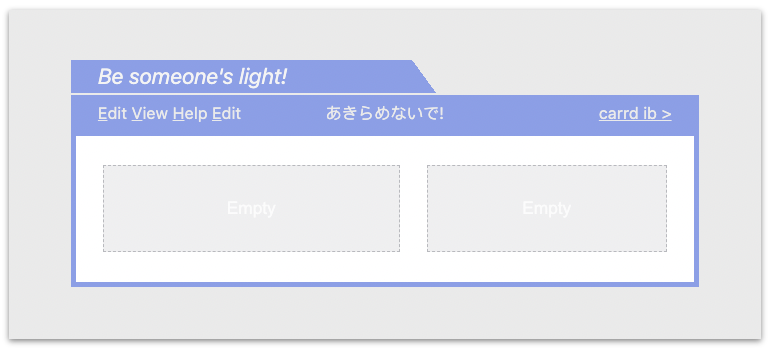
Start by adding another a Container beneath the header and set it to 3 columns of equal size.
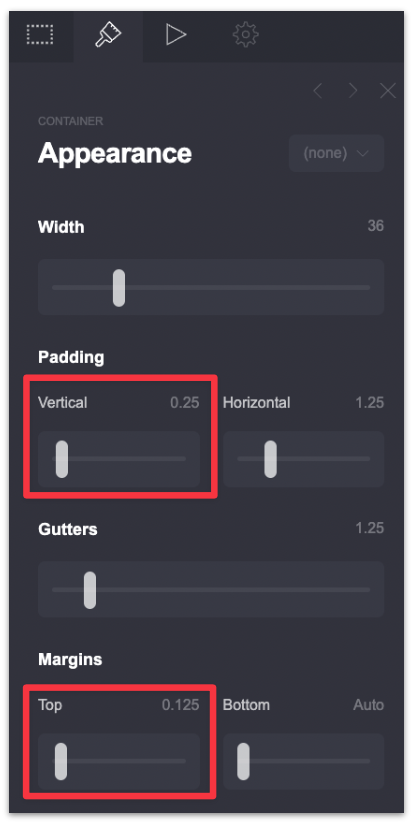
In the Appearance tab, set the Top Margin to 0.125 and Vertical Padding to 0.25, the rest should be the same.
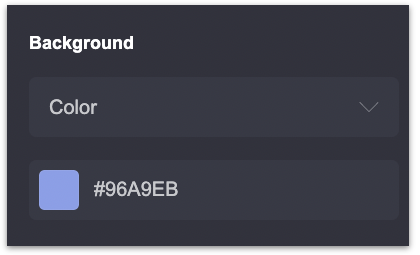
Set the Background to Colour and change it to the primary colour theme.
Here's the progress so far:
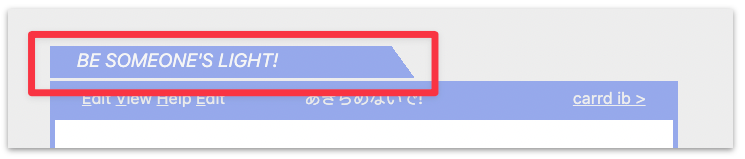
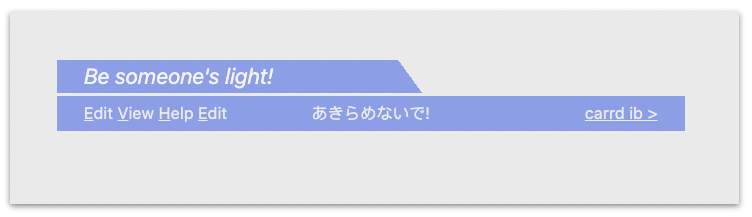
Add a Text element for each of the 3 columns. These are going to be the navigation links or texts.
Here's a tutorial on how to create links in Carrd.
[E](http://www.google.com)dit [V](http://www.google.com)iew [H](http://www.google.com)elp [E](http://www.google.com)dit
Set the Text Alignment to Left (Appearance).
Note: The above syntax highlights the first character as a link. Update the Google links to the your own URLs.
あきらめないで!
Set the Text Alignment to Auto (Appearance)
[carrd ib >](http://www.google.com)
Set the Text Alignment to Right (Appearance)
At this point your navigation menu is now complete!
Add a Container below the navigation menu with the following settings:
In the Appearance tab, adjust the following settings:

Your page should now looks like this:
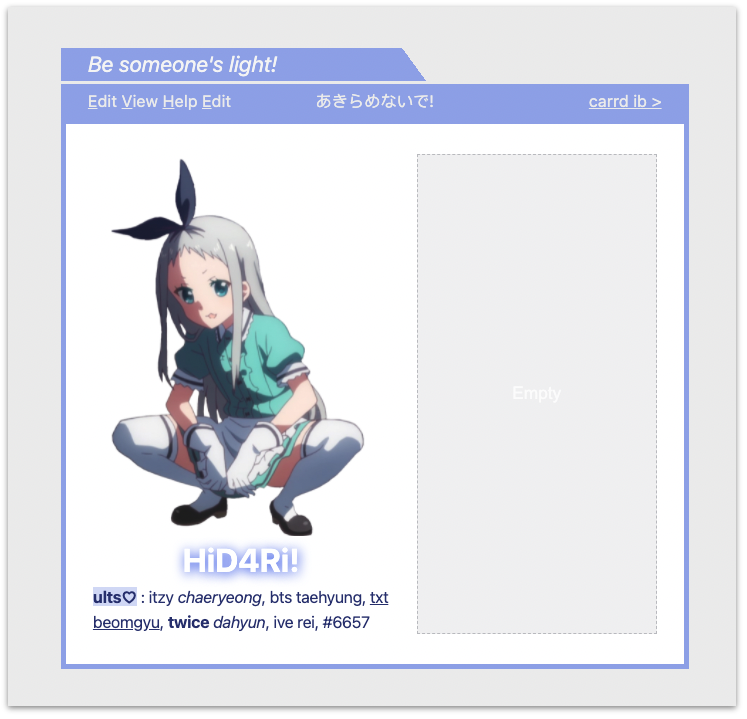
In the left column, add one Image element and 2 text elements below it.
Image — Add a profile picture of your choice. Ideally with an aspect ratio of 750 x 1000.
Click here to download sample image.
Text 1 — Add a profile name. The text in the initial design has the following appearance setting:
Text to copy:
HiD4Ri!
Text 2 — Add a profile description. The text in the initial design has the following Appearance setting:
Text to copy:
==**ults♡**== : itzy *chaeryeong*, bts taehyung, [txt beomgyu](h), **twice** _dahyun_, ive rei, #6657
Note: Adding double equal sign highlights between the text will result in a highlighted text.
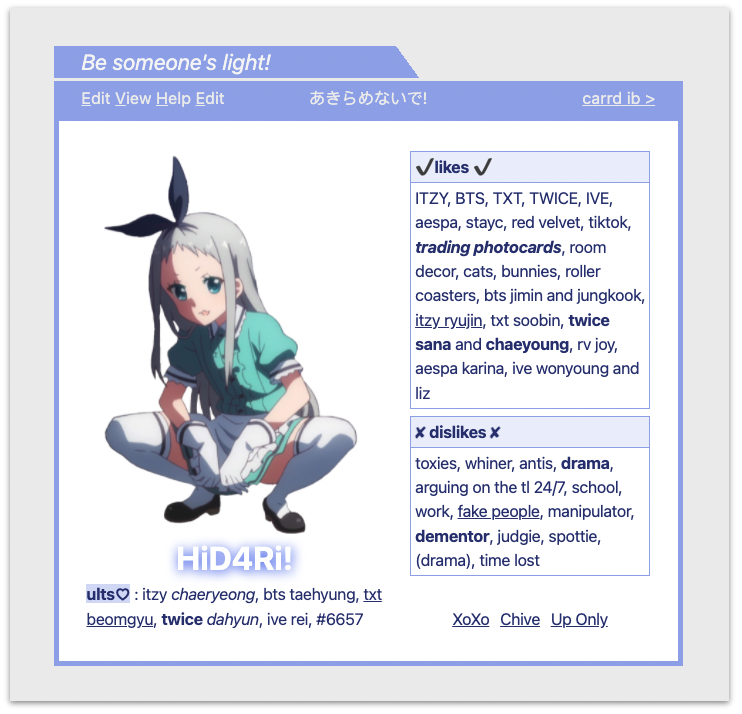
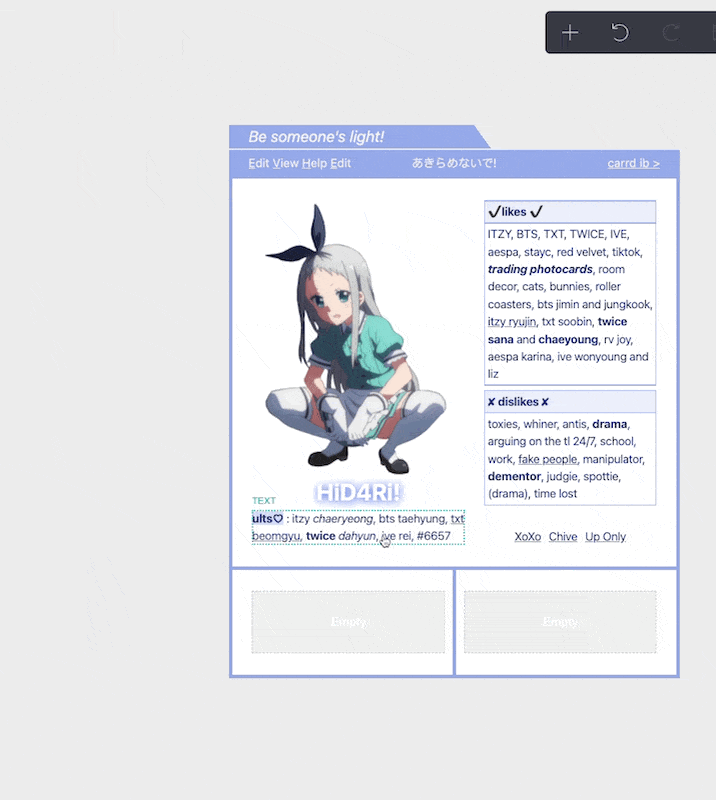
This is how your page should look like now:
We're getting there!
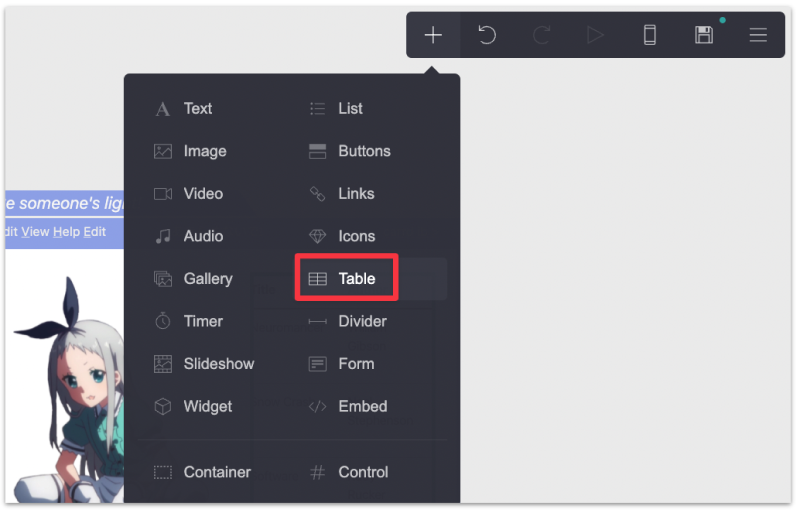
In the right column of the container, add a Table element.
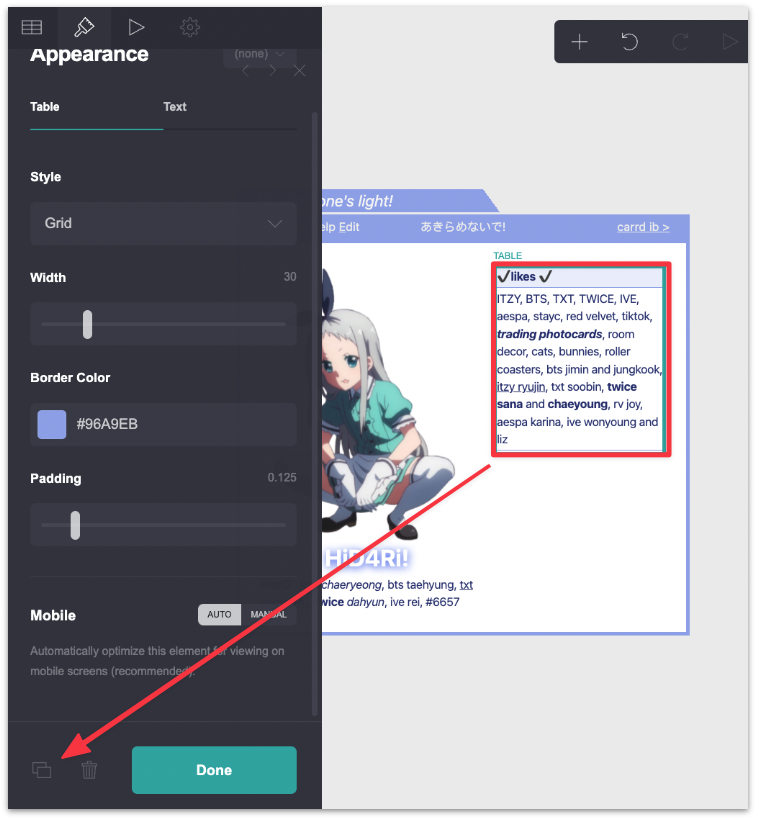
Delete all text in Headings and Rows. Add the following text instead:
Headings:
✔ likes ✔
Rows:
ITZY, BTS, TXT, TWICE, IVE, aespa, stayc, red velvet, tiktok, **_trading photocards_**, room decor, cats, bunnies, roller coasters, bts jimin and jungkook, [itzy ryujin](h), txt soobin, **twice sana** and **chaeyoung**, rv joy, aespa karina, ive wonyoung and liz
Feel free to add your personal preferences.
Head to the Appearance tab (Table element) and adjust the following settings:
Next, duplicate this table and update the Headings and Row.
Headings:
✘ dislikes ✘
Rows:
toxies, whiner, antis, **drama**, arguing on the tl 24/7, school, work, [fake people](h), manipulator, **dementor**, judgie, spottie, (drama), time lost
Again, feel free to add your personal preference.
Add a Links element below your dislikes table. Then create 3 links and name them accordingly.
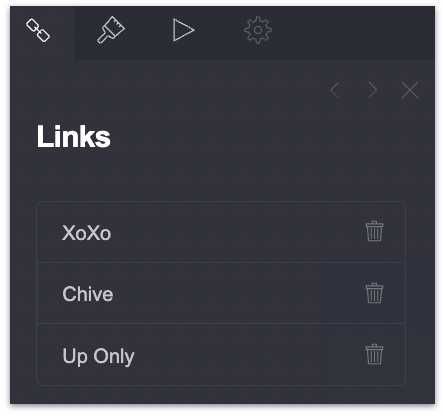
In the Appearance tab, here are the settings:
Here's the progress so far:
We're getting close!
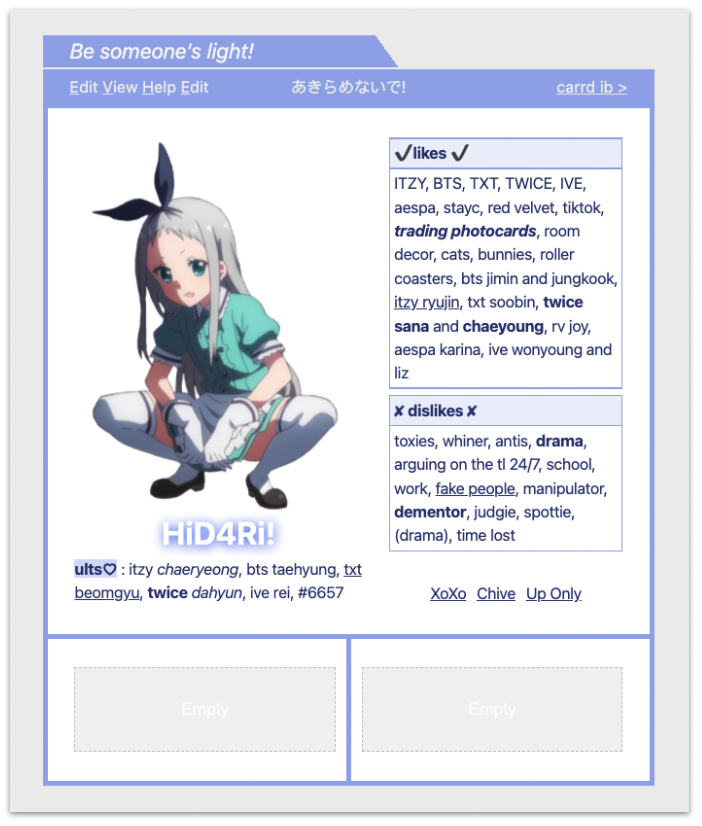
Add a Container with 2 Columns of equal size.
In the Appearance tab:
With this you have now created the Footer section outline.
Make a copy of the text you created before and drag it into each of the Footer columns
You can add whatever text you want at this point. But for this tutorial we're just going to add some trigger warning and Kins text!
Text to copy:
**==TW_!_==**
Consectetur adipiscing **elit**. Curabitur **pellentesque arcu** (pharetra) urna [dictum](h), vitae lacinia.
**==KINS_!_==**
**Dis parturient montes**, nascetur ridiculus mus. **Aliquam** consequat lacinia massa.
Congrats, You have now designed and created the Aesthetic Anime from scratch!
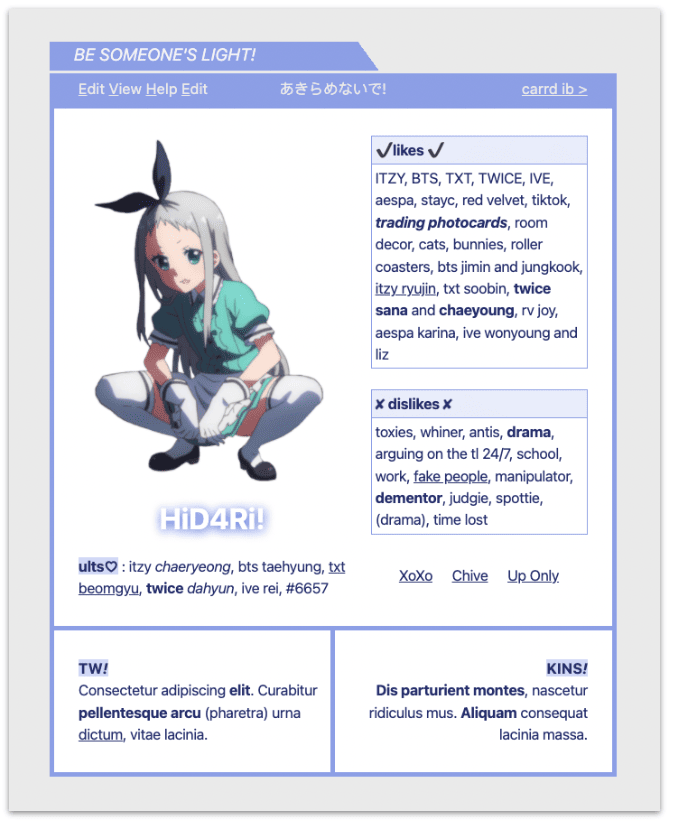
This is how the final design looks like:

If you're stuck in the midst of this tutorial you can always check out the template.
David Nge is the founder and writer behind MakingThatWebsite.com. Since launching in 2021, he’s been on a mission to help non-techies—especially small business owners—build better websites using easy-to-learn tools and smart, time-saving strategies. He specializes in website builders, SEO, and practical AI tutorials for small business owners.
Have a tutorial you want to learn? Leave a suggestion here.