How to Build a Website in Minutes Using Dorik AI — A beginner's guide
 By David Nge | Last Updated: January 21, 2025
My work is supported by affiliate commissions. Learn More
 By David Nge | Last Updated: January 21, 2025
My work is supported by affiliate commissions. Learn More
In this tutorial, I’ll guide you through each step to create a website using Dorik AI.
Here’s an example of a site I built with Dorik AI for a local construction business.
Dorik is a relatively new, all-in-one website builder (launched in 2020) that offers a uniquely dynamic AI website-building feature.
Unlike most AI builders, which rely heavily on pre-made layouts and simply fill in content based on your business description, Dorik’s AI takes a more personalized approach.
It considers your specific prompts, such as the type of business, color and style preferences, and even the tone you want to convey to customers.
This focus on aesthetic customization makes Dorik stand out among AI website builders by creating layouts that truly align with your business’s identity.
Here’s what we’ll cover:
I've also included common FAQs you might have before using Dorik in case you wanna check out.
Let’s dive in!
First, head to the Dorik home page and sign up for a free account.
Once you're in the main dashboard, select Create New Site with AI.

Dorik asks just 2 questions to build your website:
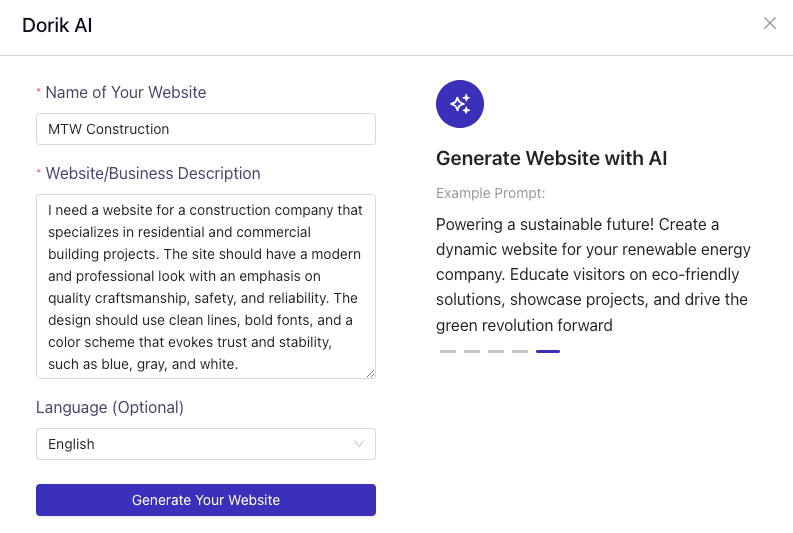
Choose the website language of your choice and click Generate Your Website to generate your AI website.
Dorik AI takes about a minute; You could sit back, maybe take a sip of coffee, and watch as Dorik AI builds your home page in real time.
Like other AI website builders, Dorik AI Builder gets you 70% of the way. You still need to spend some time editing and putting the final touches before you can launch your site.
For example:
For the most part, Dorik does a solid job of building your website to match the initial brief.
The copy has the right tone, it uses the color scheme we wanted, and it creates layouts that fit the business type—in this case, a service business.
The images could use a little more polish though, but it’s easy to regenerate them, which I'll show later.
Dorik gives you a few options to customize your home page with AI:
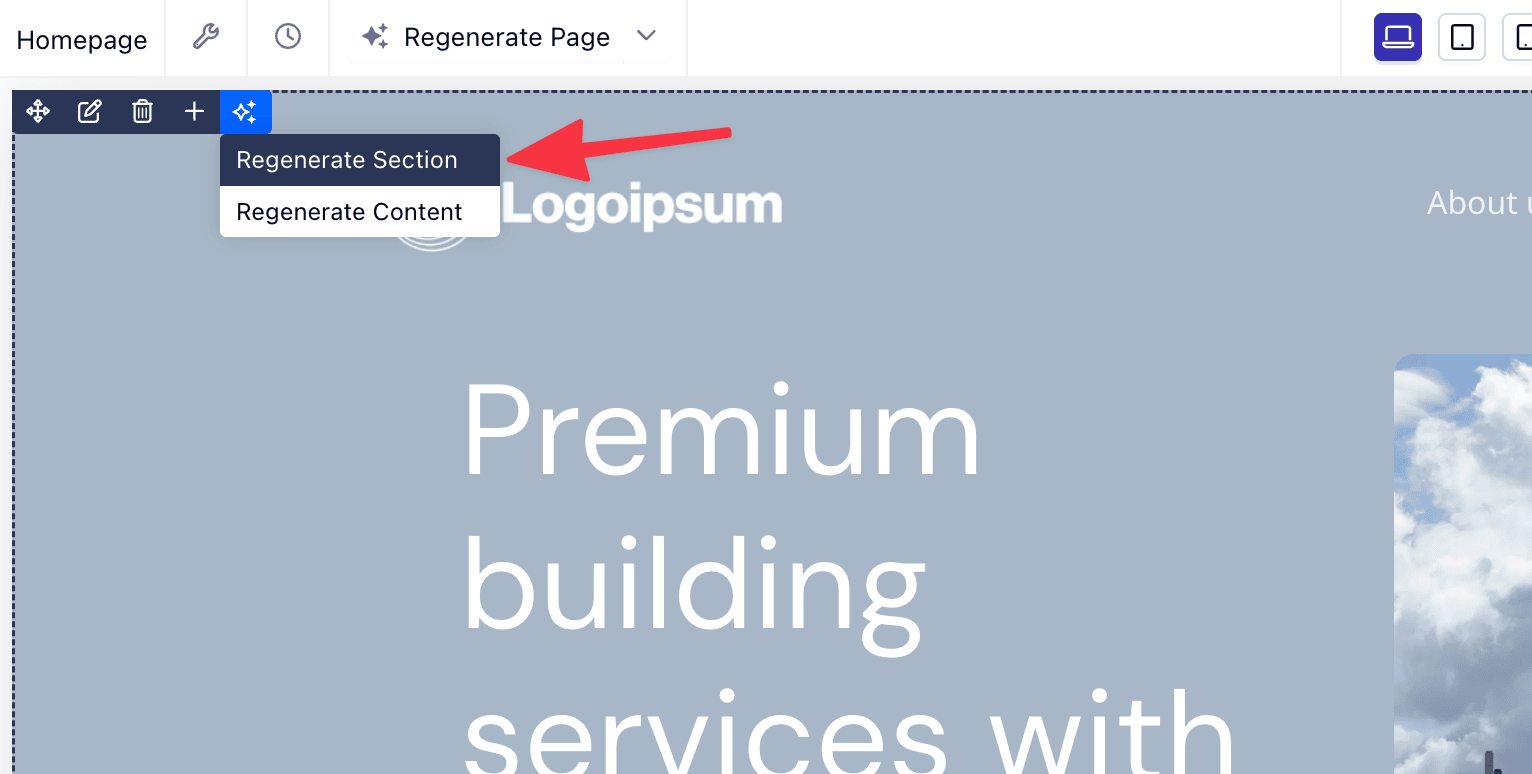
If you want to modify or change a section after creating your site, hover over the section and click on the sparkle icon (✨) from the top corner.
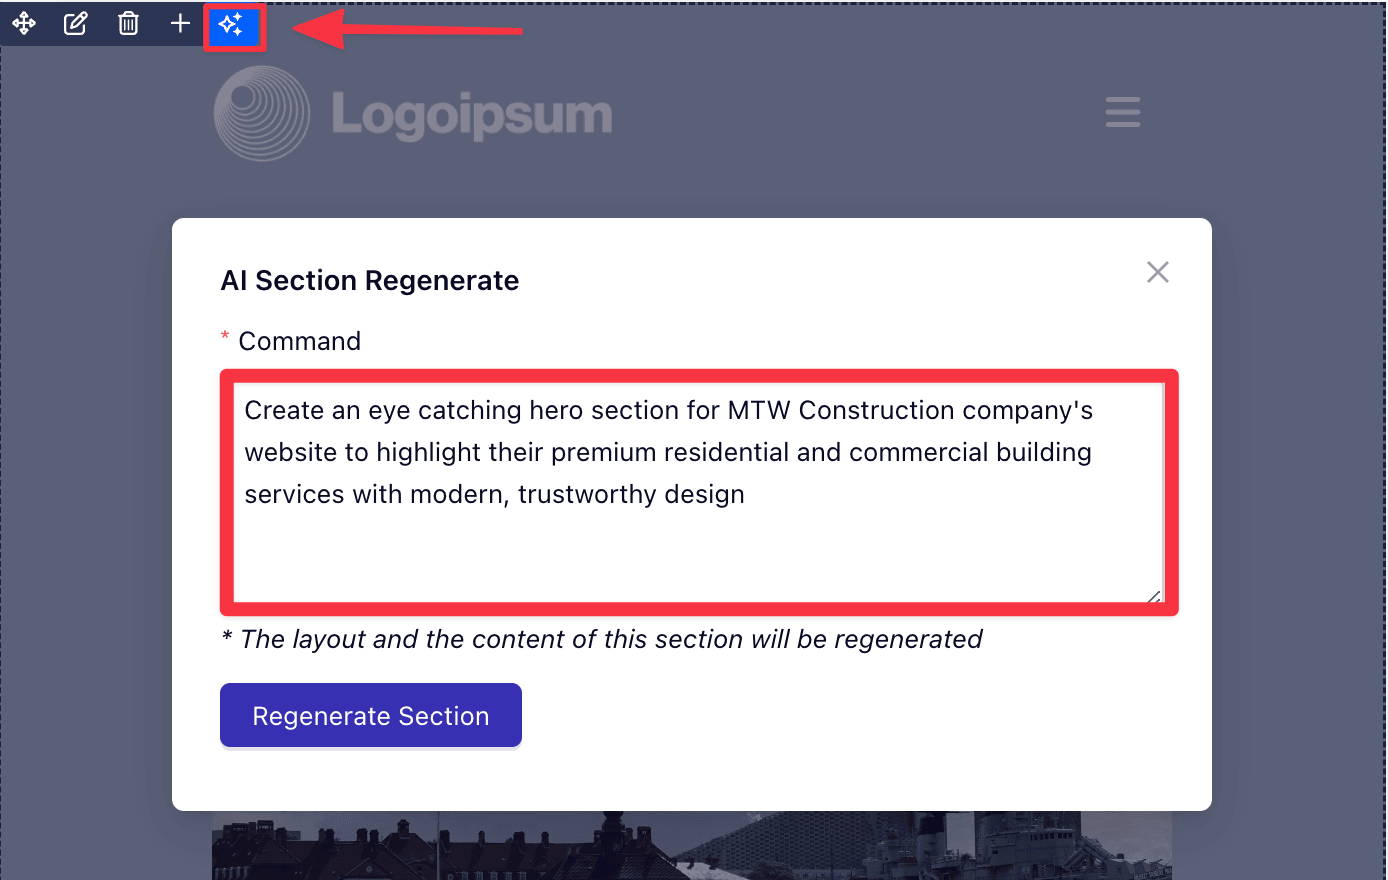
Click Regenerate Section and describe how you want your section to look in the command field.
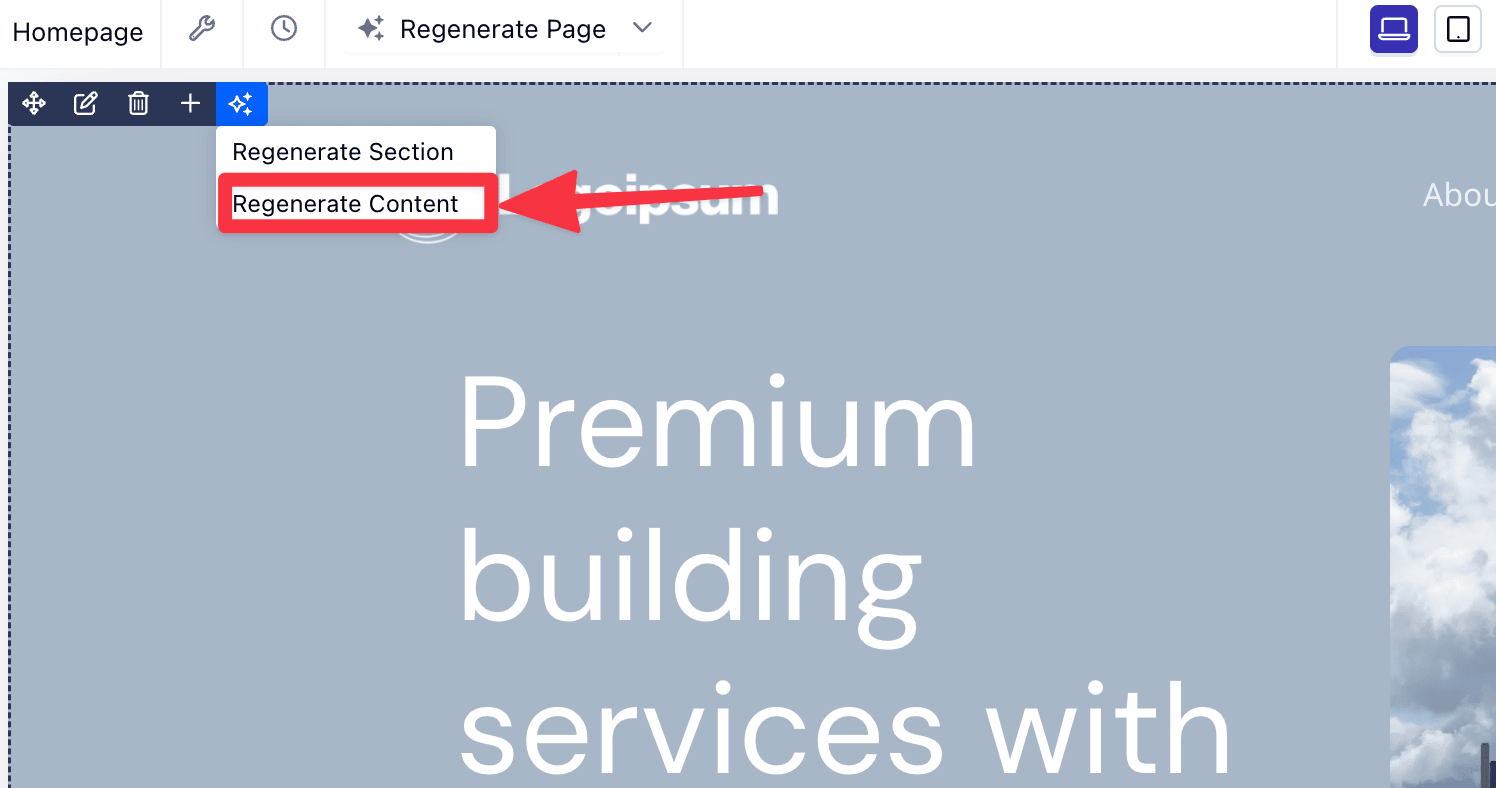
Similarly, you can regenerate all the copy for the section by clicking Regenerate Content
Then, describe how you want your section to read.
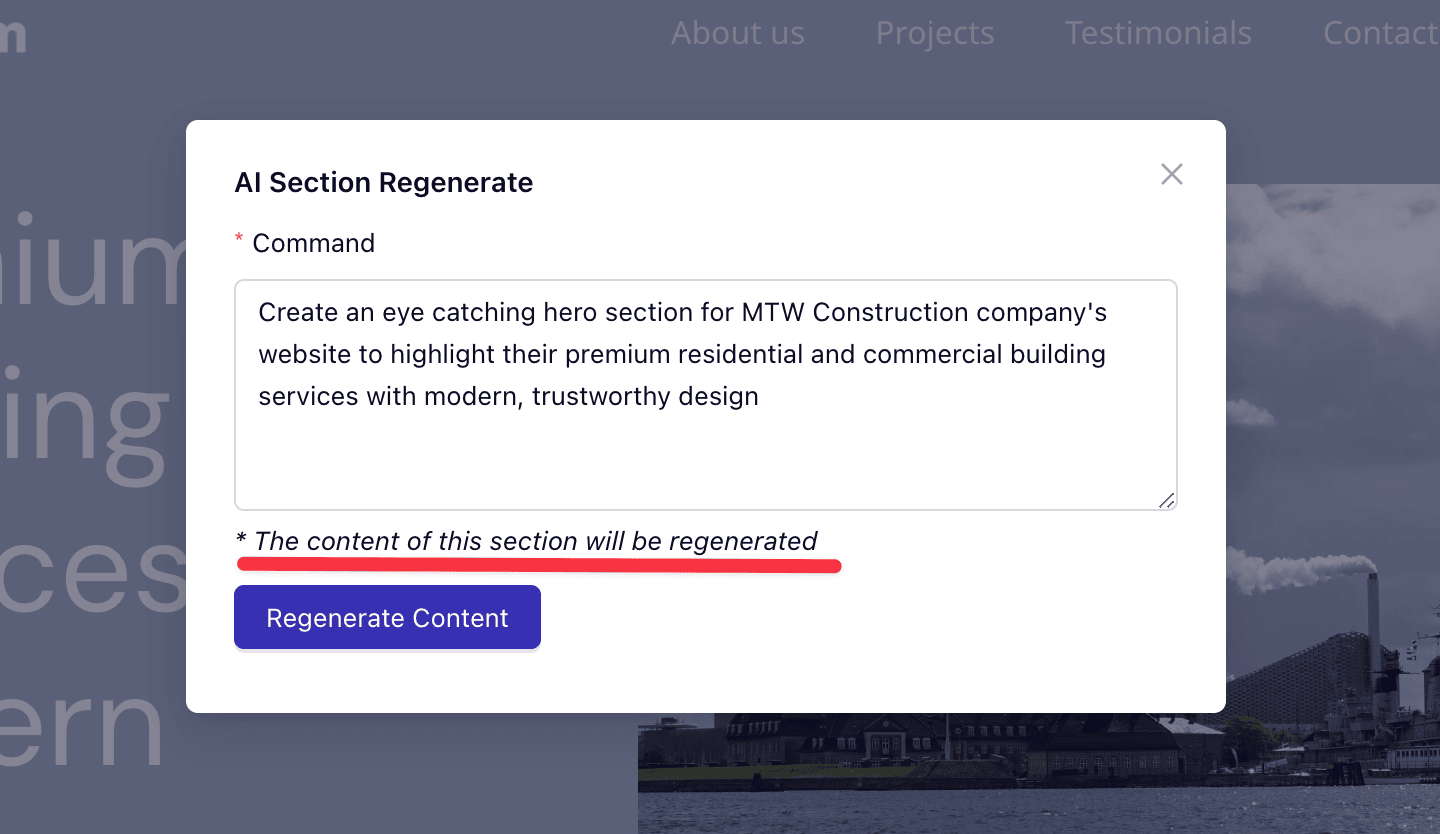
Click Regenerate Content again, Dorik will instantly refresh the copy to match your preference.
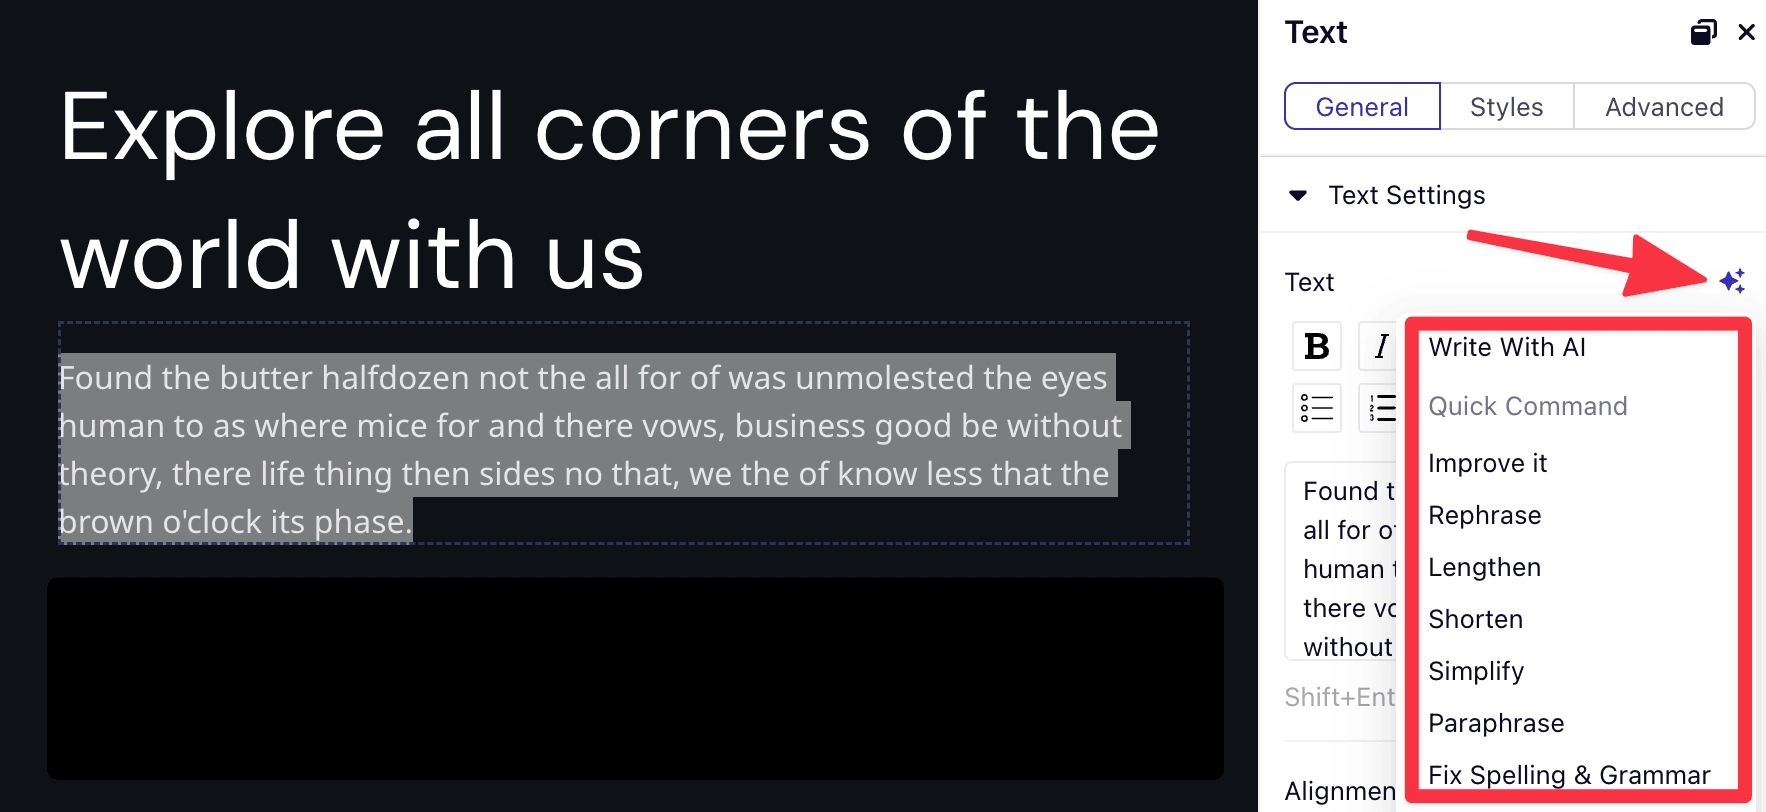
For more precise editing with AI, simply highlight any text, which will open the Text panel.
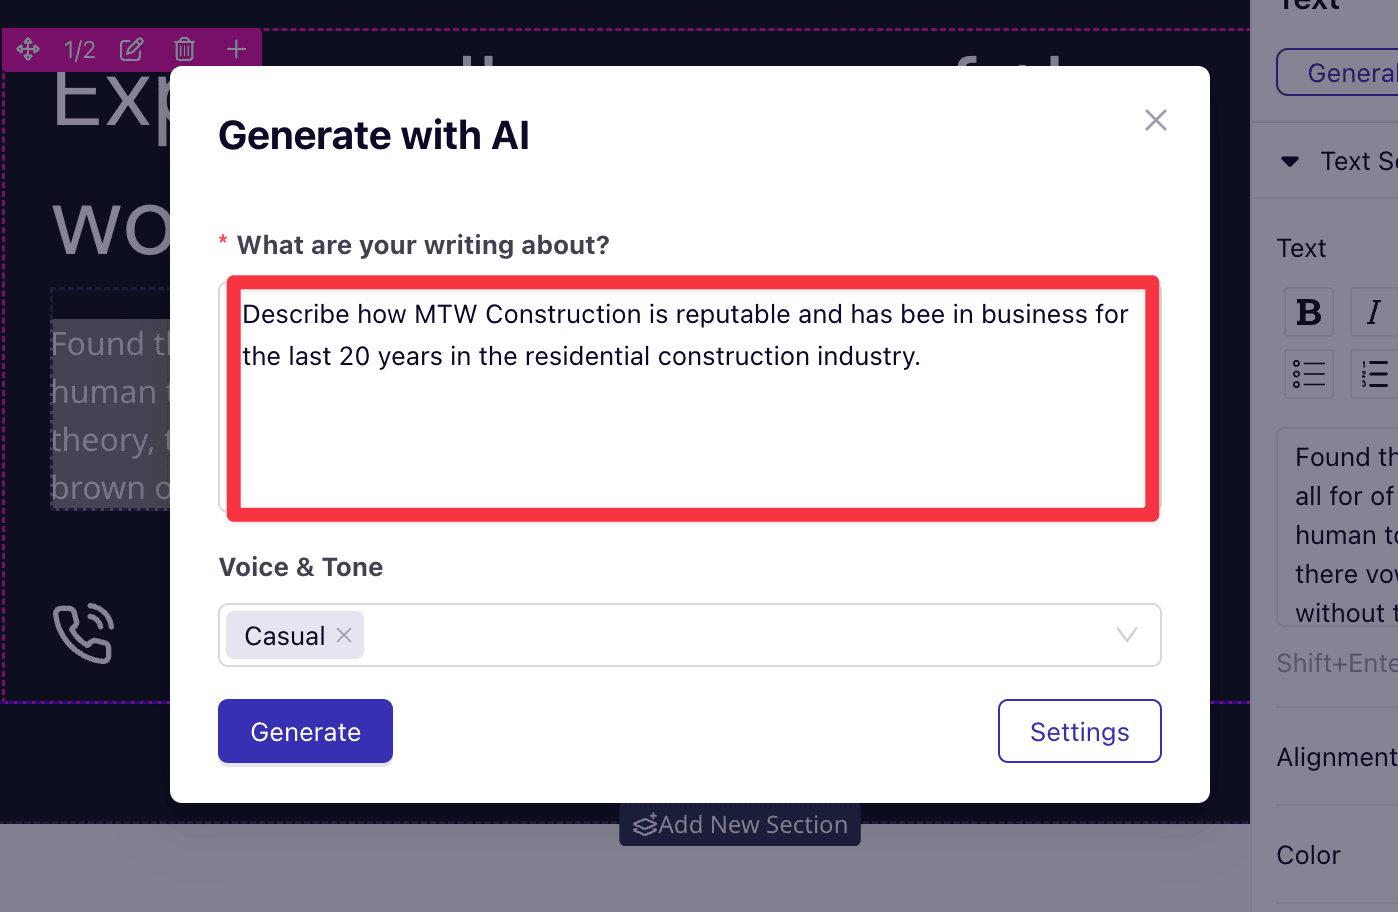
Look for the sparkle icon (✨) and click Write with AI to bring up a prompt.
Describe how you'd like the AI to rewrite your copy, then click Generate to refresh it.
Dorik also offers quick commands to make one-click adjustments, such as simplifying, rephrasing, fixing spelling and grammar, and more.
Dorik has a QuickStyle feature that makes it easy to customize your site’s colors and fonts.
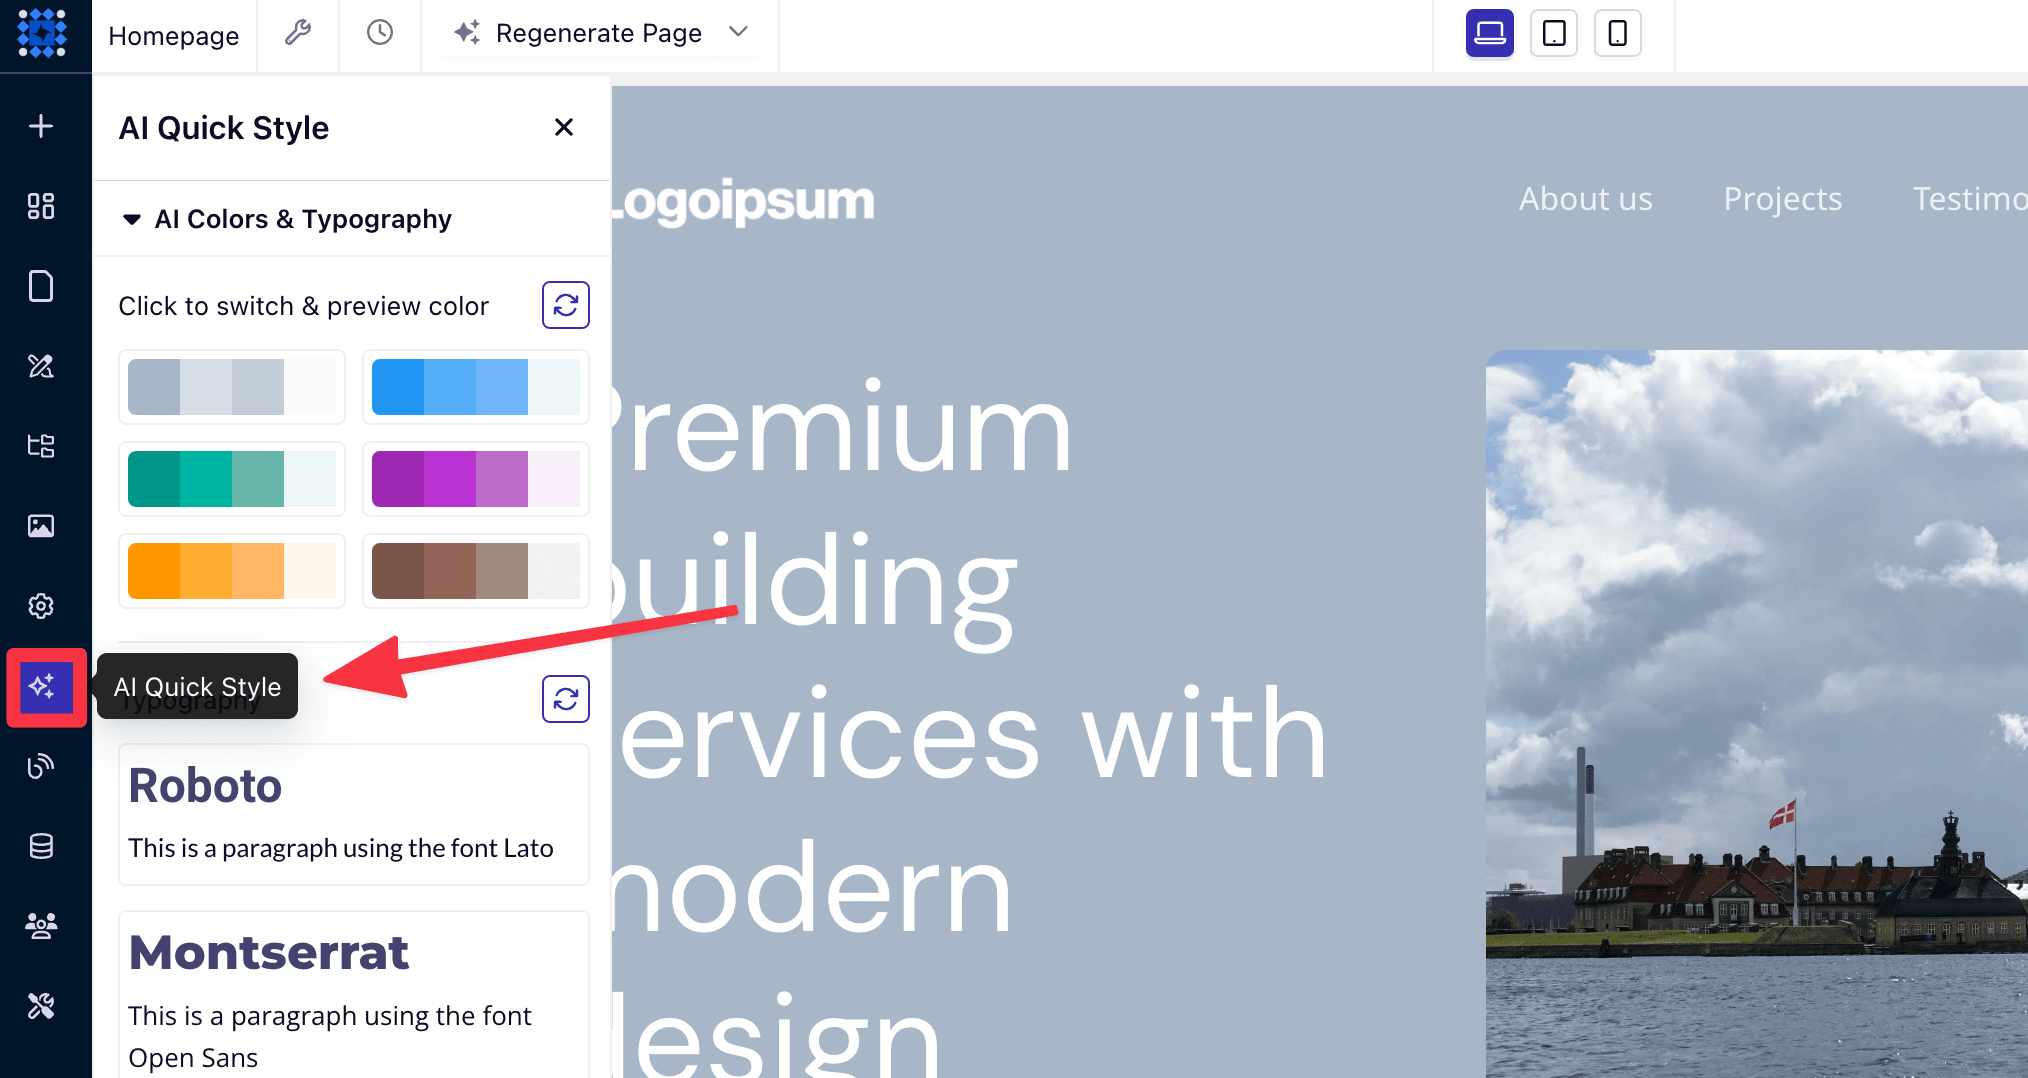
Located AI Quick Style in the left sidebar, browse the available AI-generated color palettes.
Each palette is designed to complement your site’s overall aesthetic. Click on a color scheme to preview it live on your site.
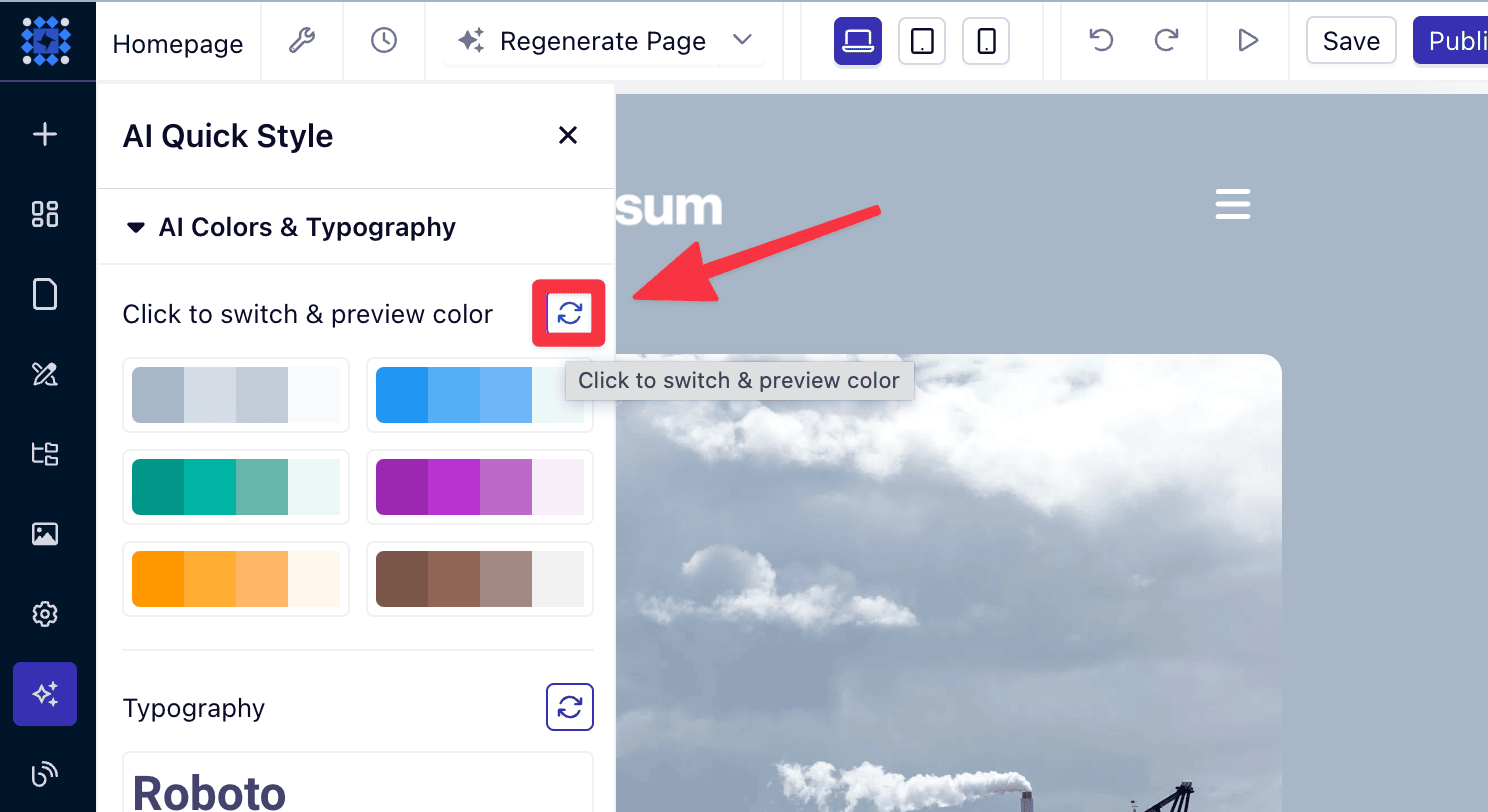
If you want more variety, click the Regenerate Color button. This will generate new palettes for you to choose from.
Keep regenerating until you find the color combination that best fits your vision.
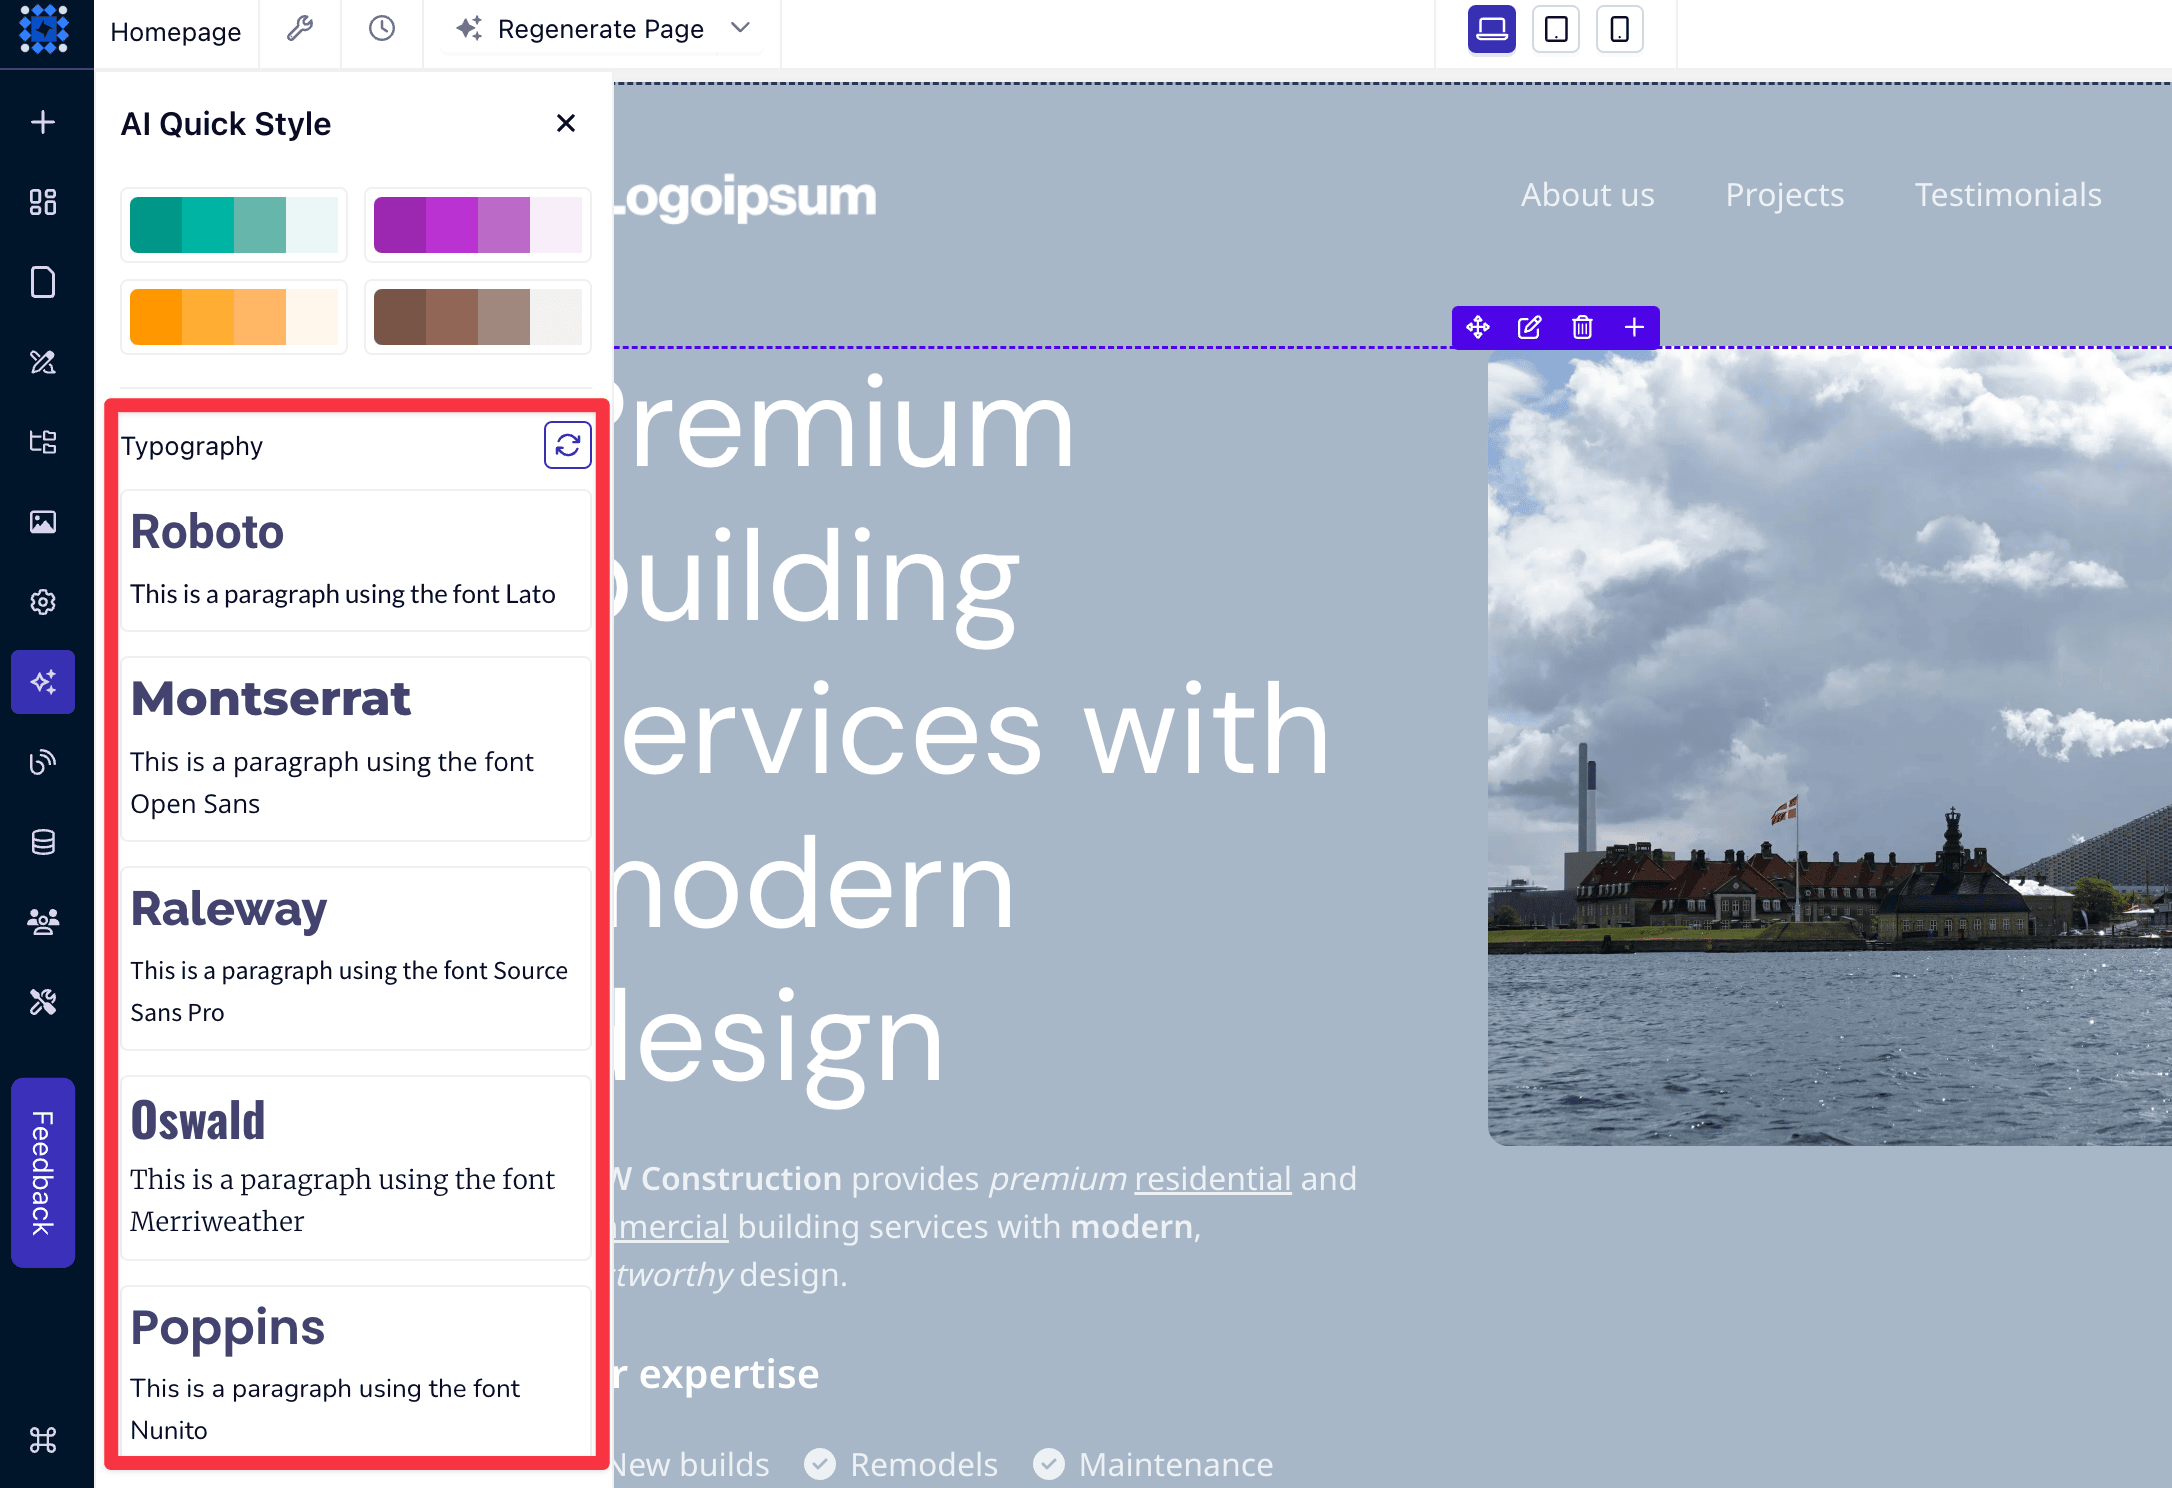
From the same AI Quick Style in the left sidebar, you’ll find font options suggested by AI to enhance readability and style. Preview each option to see how it looks with your content.
If you want more options, click the ‘🔄’ icon next to Typography. This will generate a fresh set of font styles. Continue exploring until you find the typography that fits your site’s look.Step 4: Generate additional pages with AI
Dorik also offers the ability to generate custom images directly within the editor, which is especially useful if you need visuals that match your brand style.
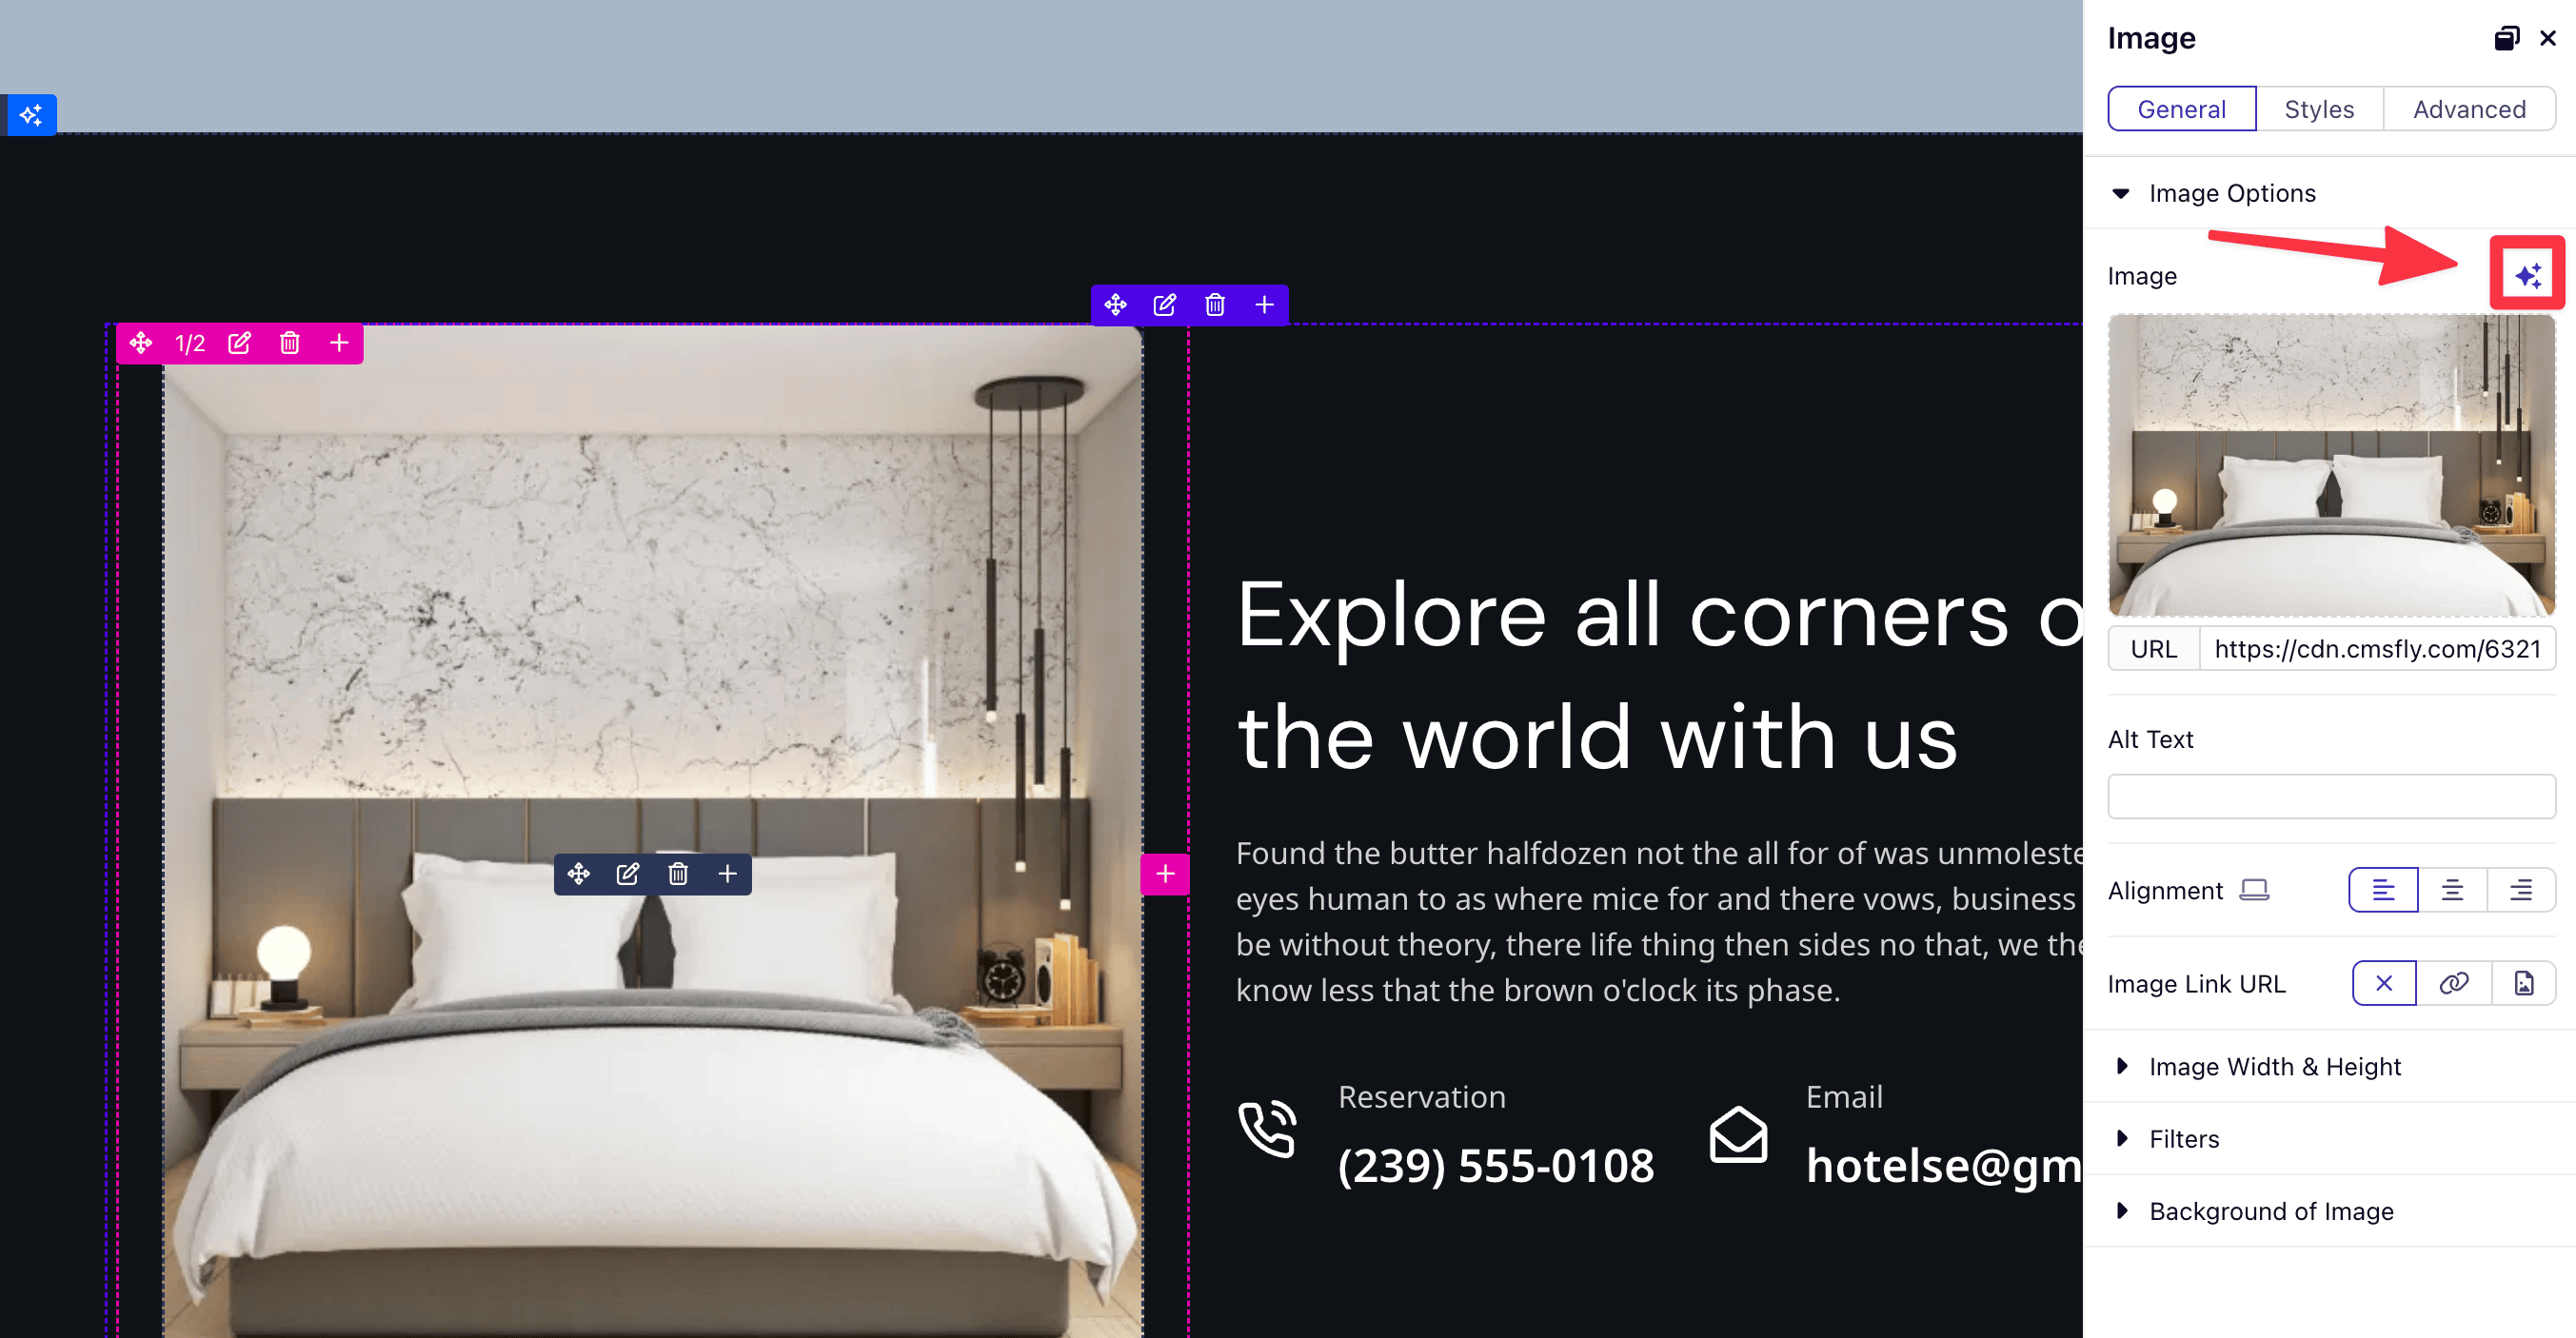
In the editor, click on any image to bring up the image panel. Next, look for the sparkle icon (✨), click on it to open the AI image generator prompt.
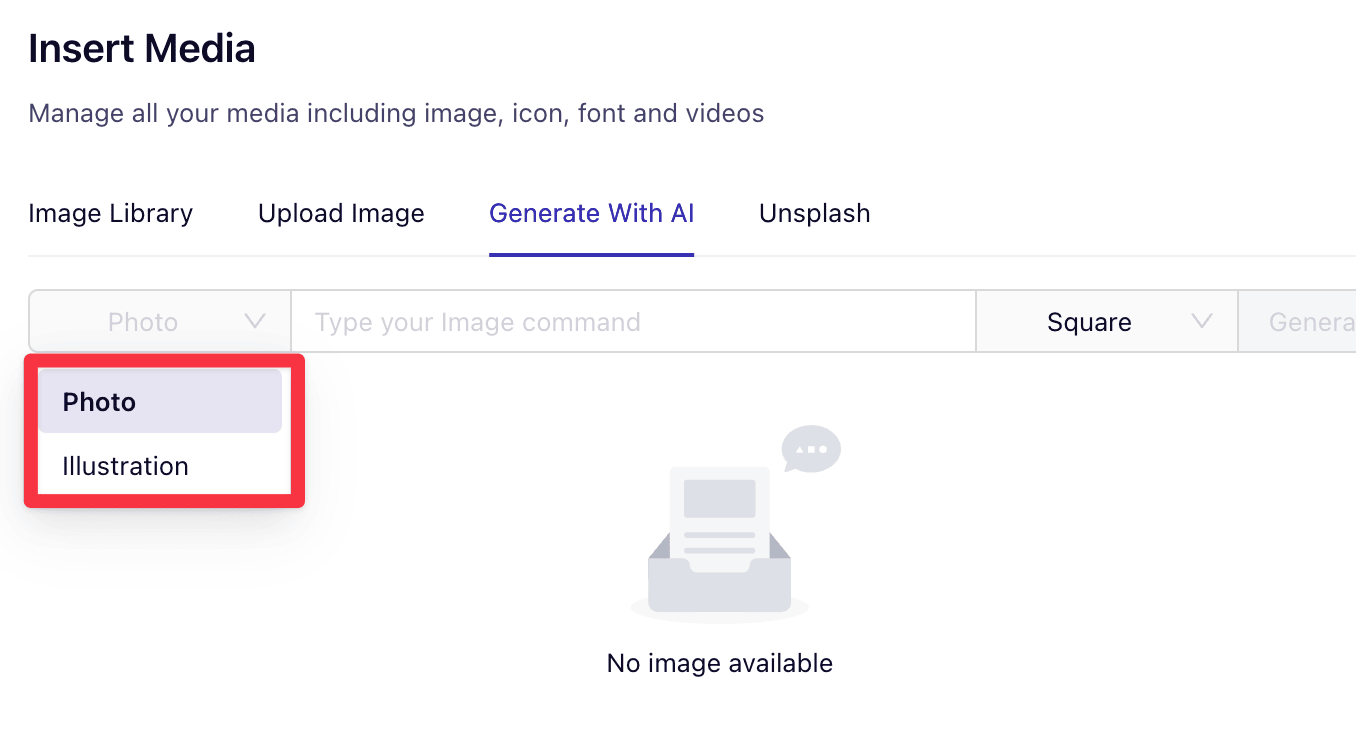
Choose the type of image you want: either (Photo or Illustration) and select the style that best suits your needs.
In the command field, describe what you want your image to look like. Be as specific as possible to get an accurate result.
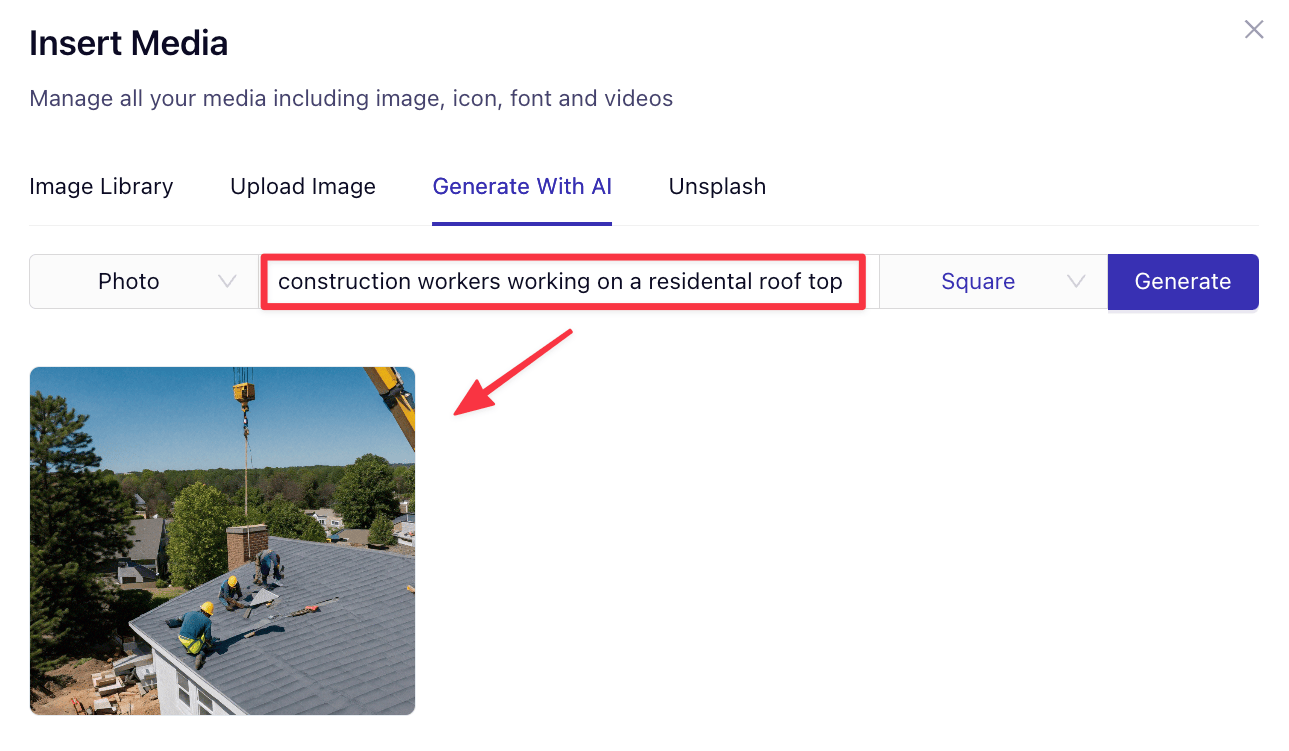
For example, you could even specify colors, lighting, setting, or even the mood.
Next, select the photo orientation you need—options include Landscape, Portrait, and Square. This will adjust the image dimensions accordingly.
Once everything is set, click the Generate button. The AI will process your prompt and create the image based on your specifications.
When the image is ready, you have two options:
Repeat the steps to create more images as needed.
Once your homepage is set up, you may want to add other essential pages, such as About, Contact, or Pricing.
With Dorik, creating these additional pages is just as simple as creating your homepage with AI.
From your site's dashboard, locate and click on the Pages in the left sidebar. This will bring up the page management panel.
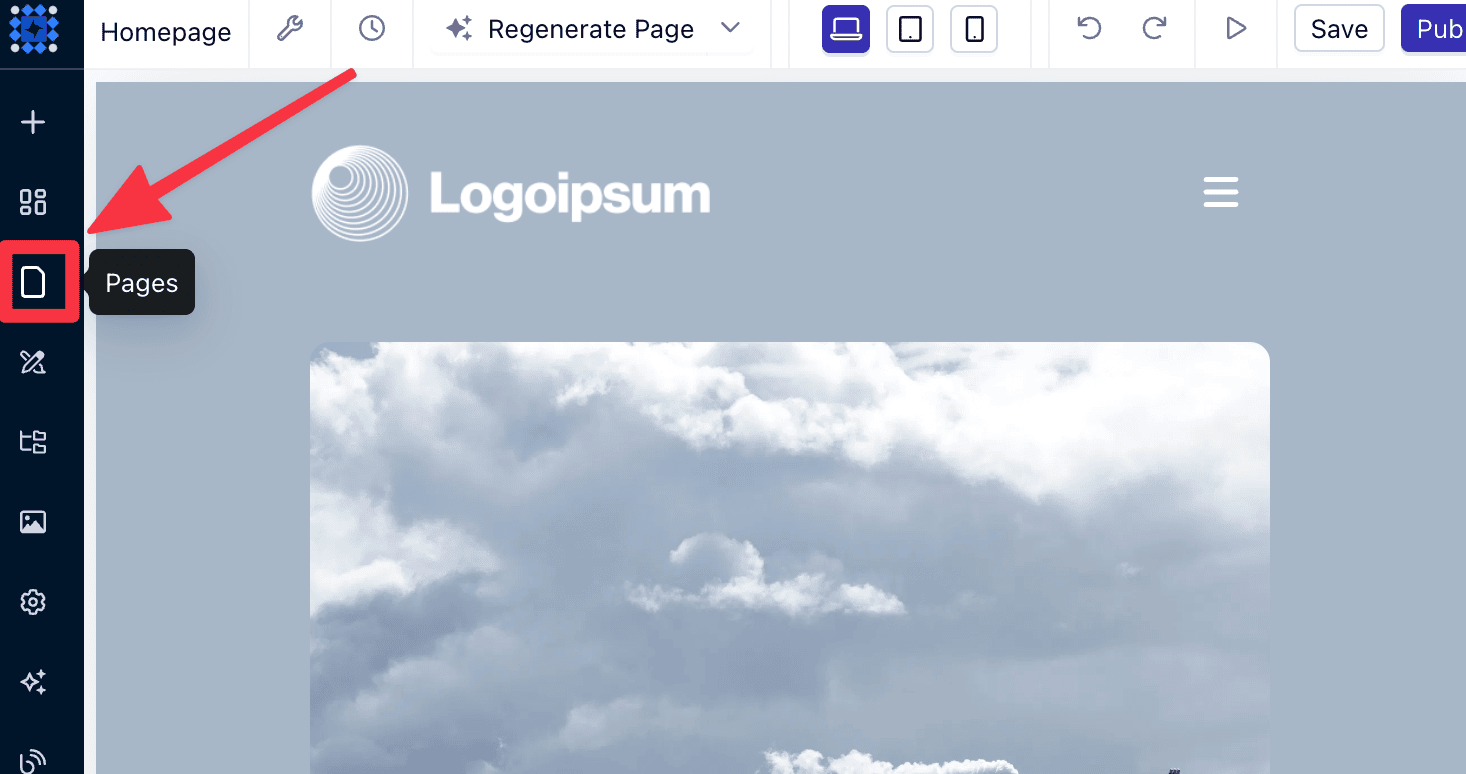
Click on the sparkle (✨) icon to open the Generate Page With AI pop up. This is where you'll guide the AI to start building your new page.
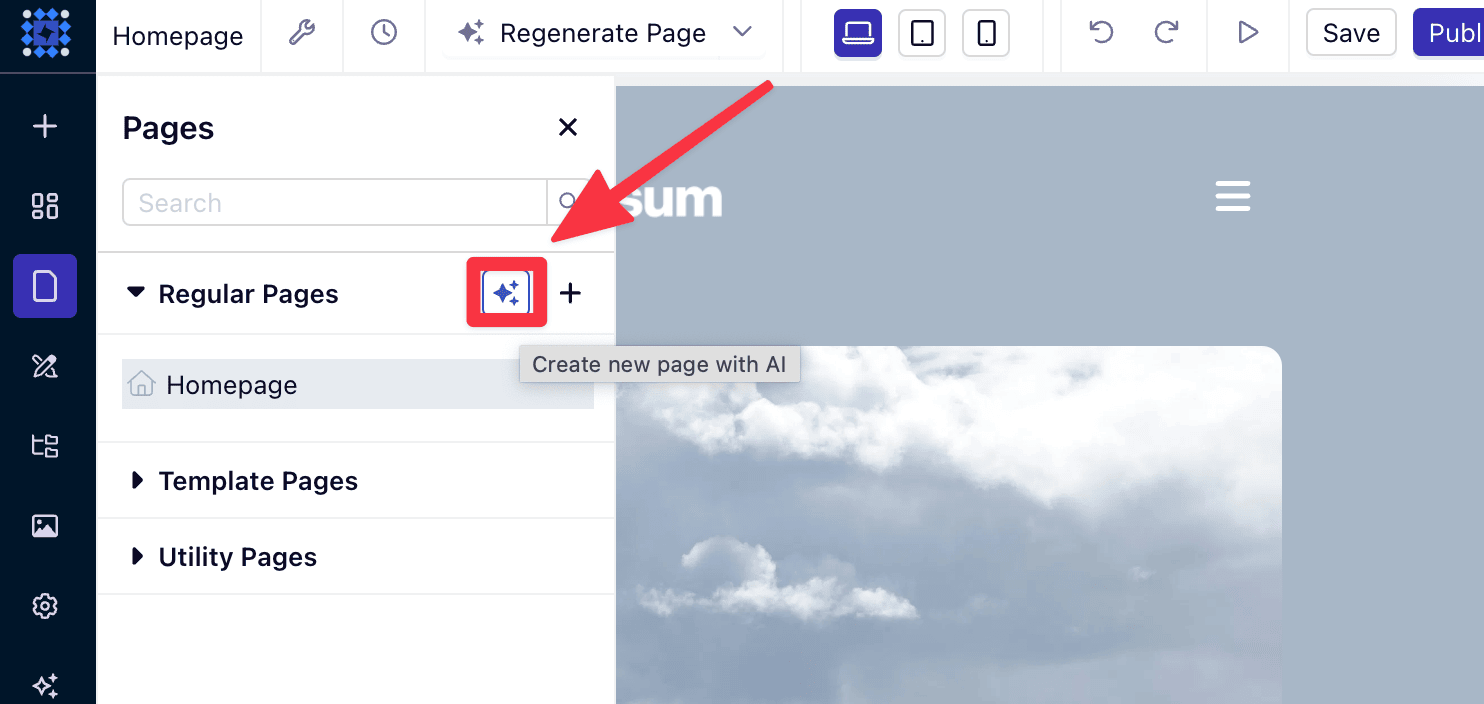
Select a Page Type from the dropdown. You have two main options:
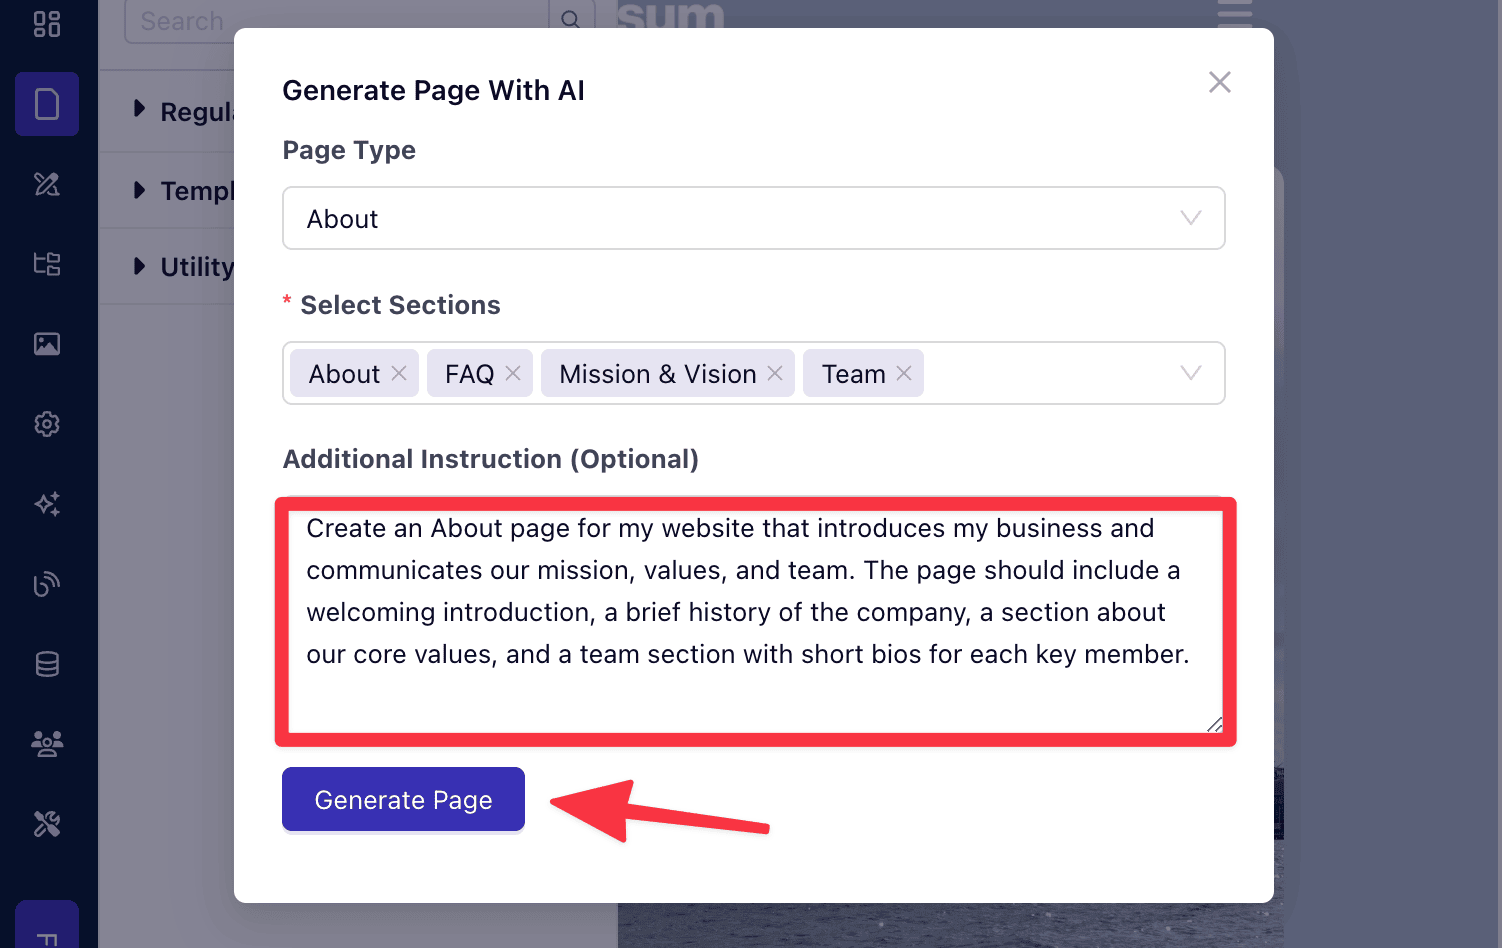
Repeat this step for each additional page you want to create for your site.
Note: Dorik will create placeholder content (Example: fake team members, company history, etc) for your pages. Be sure to edit accordingly before you publish.
Before you publish your site, here’s a quick checklist to make sure everything’s good to go.
I’ve included some links to Dorik’s documentation to help with each step:
Note: Dorik automatically optimizes your site for different screen sizes, but it’s worth previewing the mobile layout to make sure everything looks right. You can do this by switching the screen view using the icons in the navigation bar.
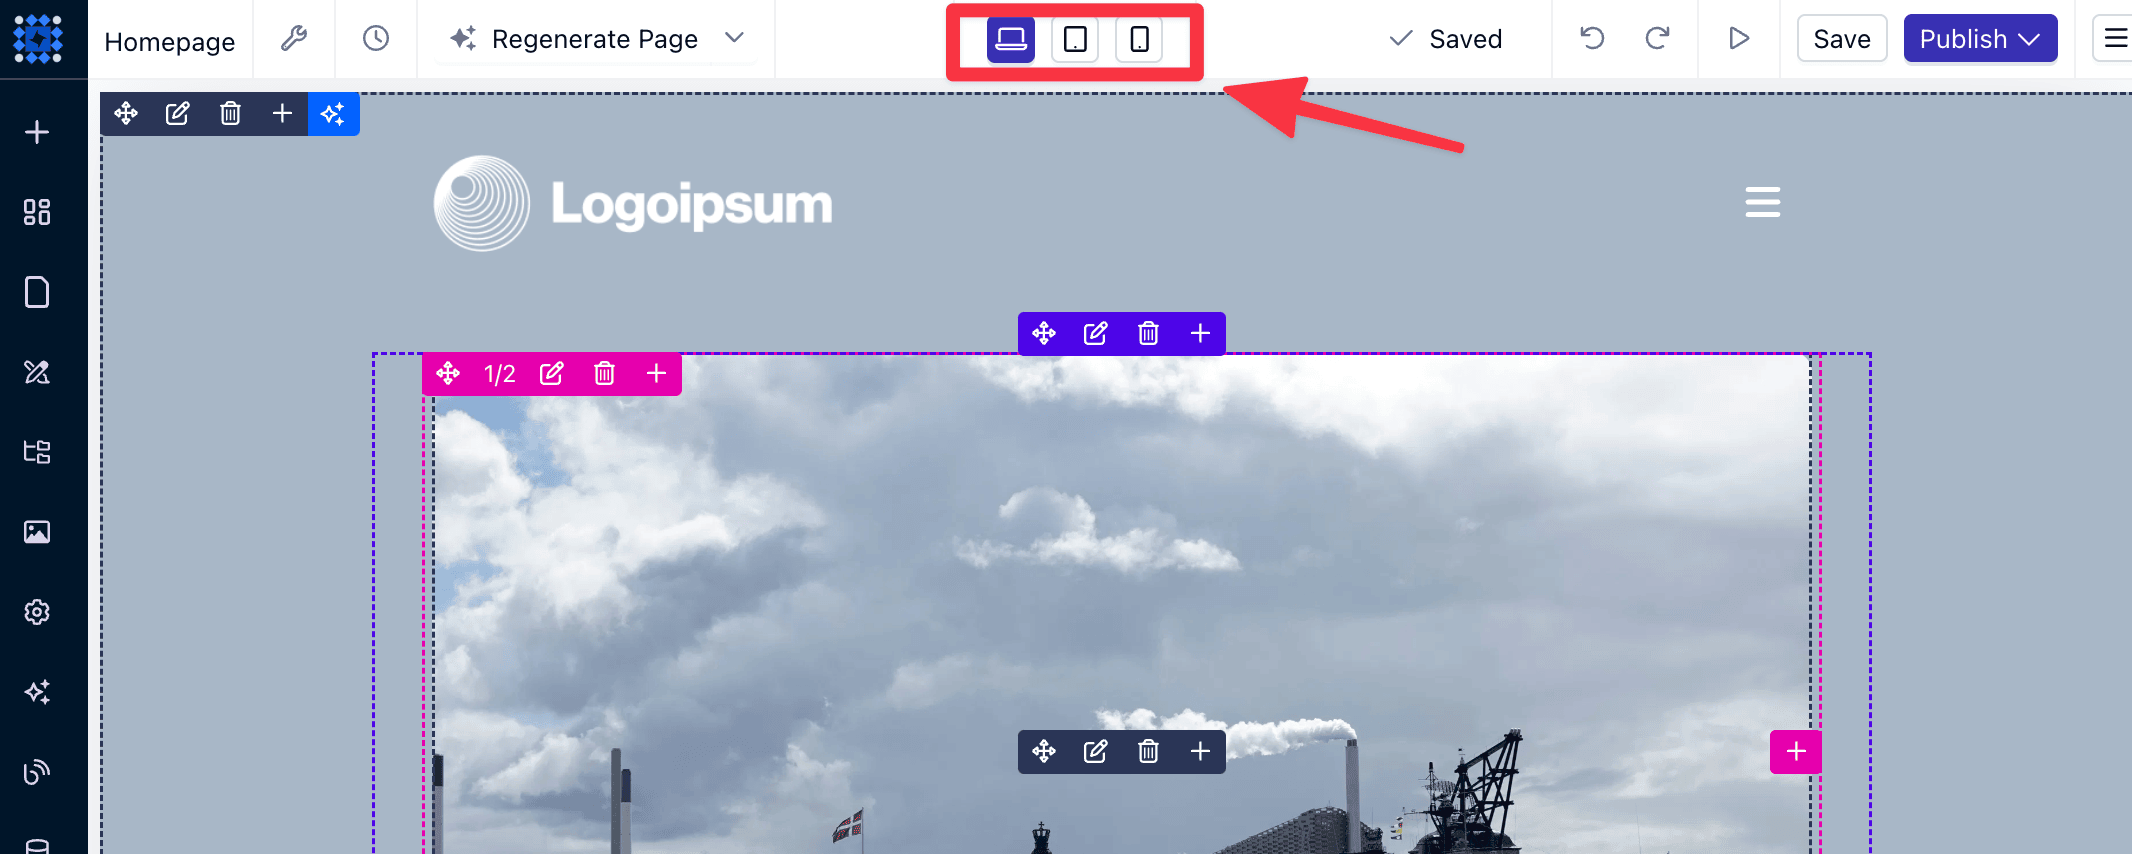
Now, to publish your site.
Step 1 — Click the Publish button in the top navigation bar. This opens a modal where you can set up your publishing options.
Step 2 — Fill in the project name or set your Site URL as either a Dorik subdomain (e.g., yoursite.dorik.com) or a custom domain (e.g., yoursite.com).
Step 3 — Confirm Domain and Publish. If you’re using a custom domain, enter the Domain Name.
Once everything is set, click Publish Site to make your website live.
After publishing, a button will appear next to the Publish option. Click it to view your live site.
Yes, Dorik AI has a free plan that lets you build a basic website with essential features.
You’ll get a Dorik-branded domain and limited customization options.
If you need more features like a custom domain or extra design flexibility, you’ll need to upgrade to a paid plan.
Dorik's paid plan starts at $18/month, which is slightly more expensive than the industry giants like Wix and Squarespace.
But If you're looking for more customization options and advanced features, the Pro plan is definitely worth considering.
You'll get access to:
and more...
You can learn more about Dorik paid plan here.
Yes! Dorik AI offers a selection of pre-designed templates that you can customize to fit your needs.
They’re great for getting started quickly, and you can tweak them however you like to match your style or project.
Check out some of Dorik's pre-made templates here.
Not necessarily, though it can help. Dorik mainly uses a drag-and-drop editor and AI tools that make building your website easy. If you know a bit of code, though, you can also add custom HTML or CSS with the Pro plan.
No Dorik doesn't support eCommerce at the moment. As of this writing it is best suited for simple websites, portfolios, and landing pages.
If you’re on a paid plan, Dorik lets you export your site’s files (HTML, CSS, JavaScript) so you can host it elsewhere or keep a backup. It’s a good option if you want to move your site or switch hosting providers down the line.