How to create a website with AI (step-by-step)
 By David Nge | Last Updated: March 13, 2026
My work is supported by affiliate commissions. Learn More
By David Nge | Last Updated: March 13, 2026
My work is supported by affiliate commissions. Learn More
In this tutorial, we will build a website for a therapist using Hubspot's new AI website builder
We'll walk you through:
They have a generous free plan.
It's one of the few website builders that allow you to create a website with custom domains on the free plan, plus, it also comes with several free marketing tools.
Note: This whole process is free and does NOT require a credit card.
Let's get started.
You'll be guided through the account creation and onboarding process. After you finish answering the questions, you'll be redirected to the dashboard.
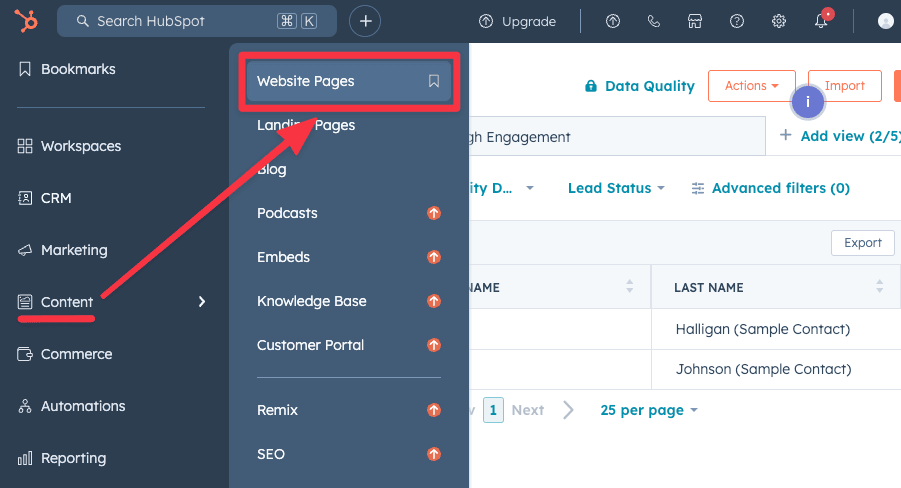
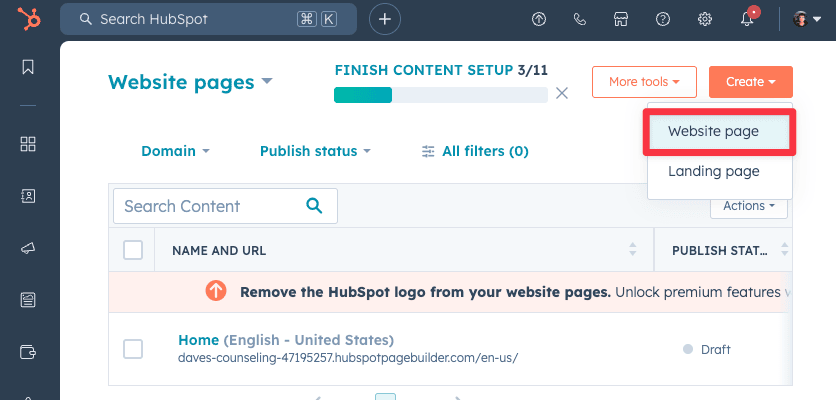
Then hover to the sidebar and navigate to Content ➝ Website Pages.
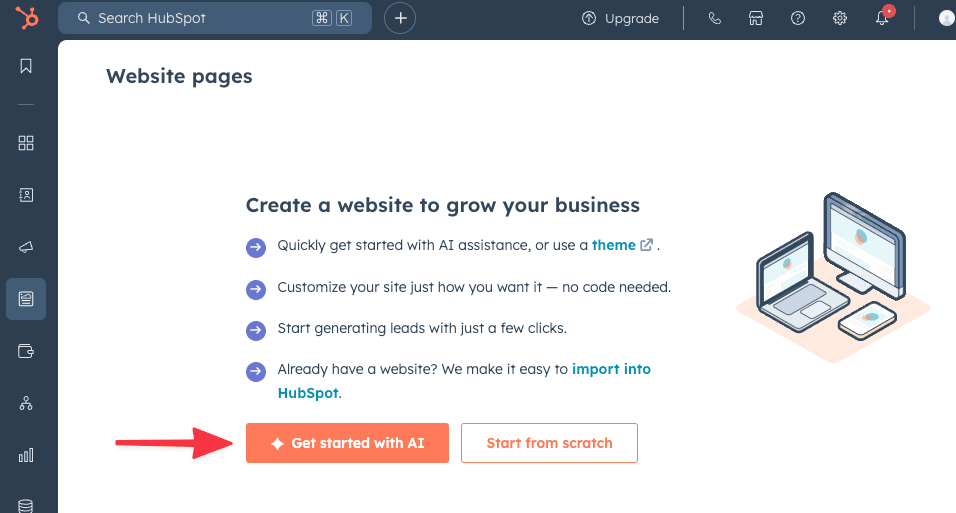
In the next page, select "Get started with AI" to start creating a Hubspot website with their latest AI website generator.
To create a website with Hubspot AI, they need to collect some information about your business and what kind of website you want to build:
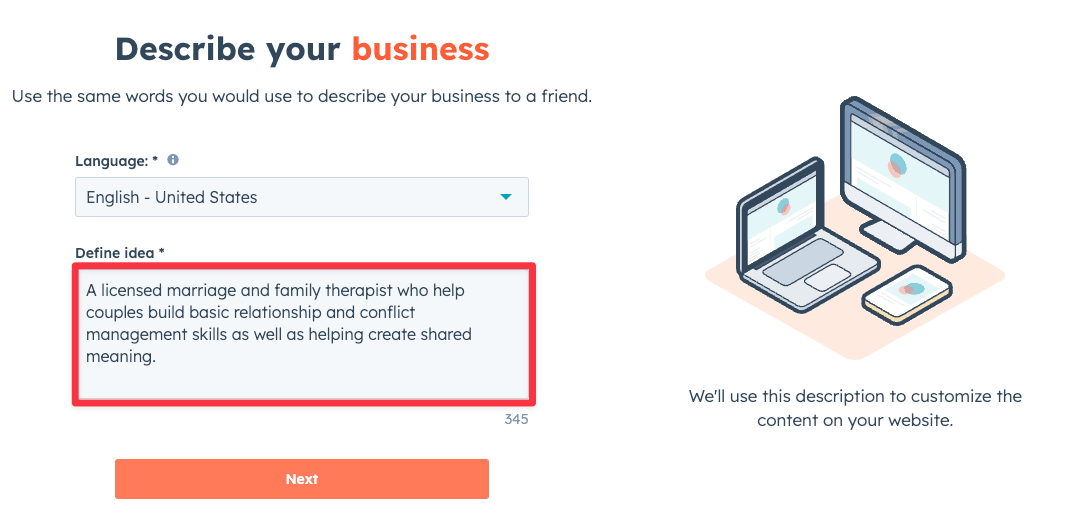
1. Describe Your Business: The website AI generator tool will first ask you to describe your business. Based on your answer, the AI website generator will write the copy for your business.
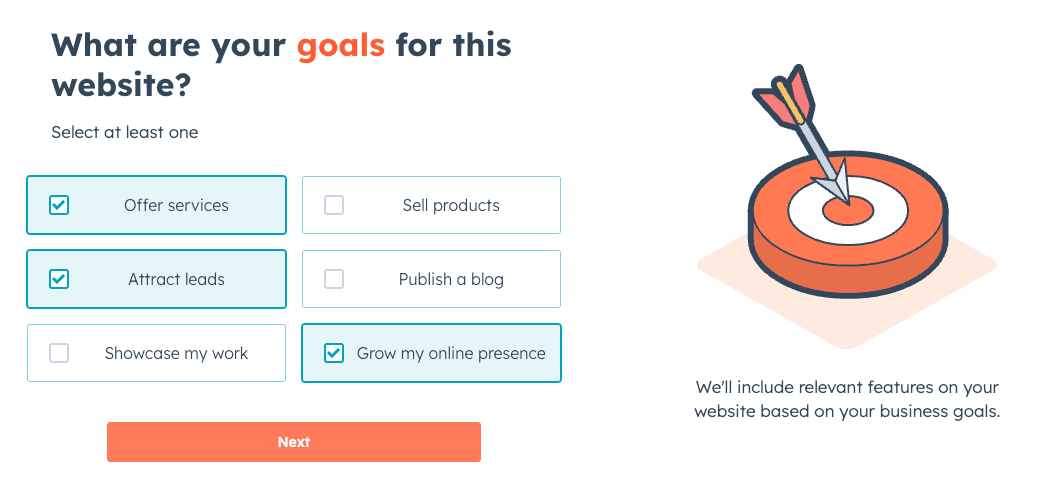
2. Set Your Goal: It will then ask for the goal you're trying to achieve with your website. This prompt influences the type of sections that will be included on your site. For example, the AI will include a lead sign-up form if your goal is to generate leads.
3. Choose Your Style: Next, it will ask for the style you like. After some testing, this prompt primarily influences your site's font and color scheme choices.

I appreciate that it gives you a preview of your site, which they show on the right side of the prompt.
Based on your answers to these 3 questions, the AI website generator will generate a website homepage in about 30 seconds.
To be honest, the default homepage created by Hubspot's AI generator tends to look quite generic:
That said, we can easily fix those.
Let's start with the hero image — This is the main background image right under the header.
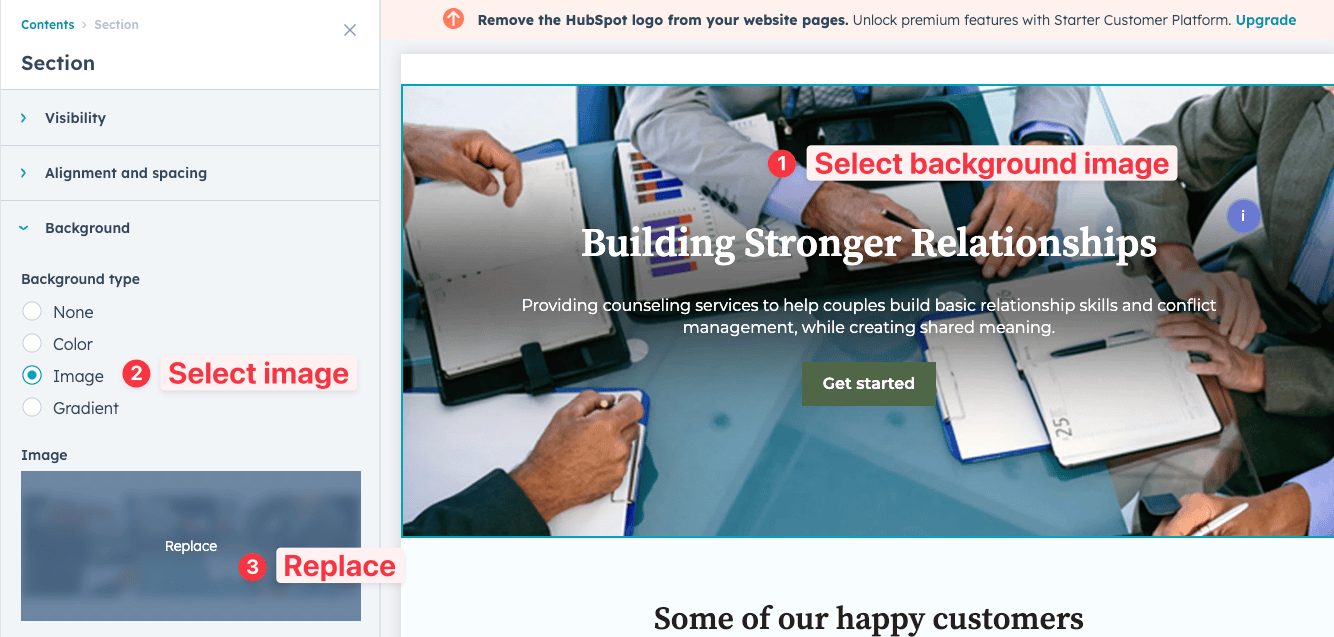
Simply click on the hero image, and the corresponding module sidebar will appear. Then, go to Background ➝ Image ➝ Replace.
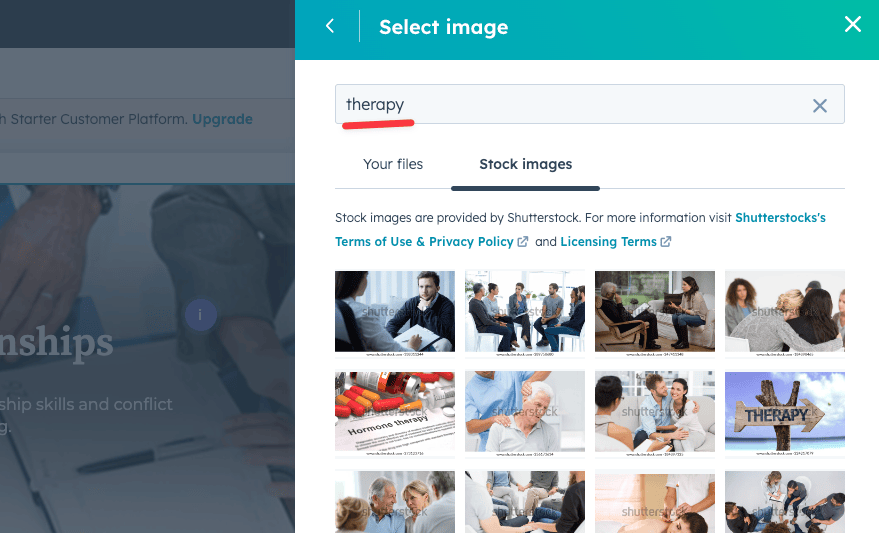
You can either upload your own image or choose from over 60,000 royalty-free stock images that HubSpot has licensed from Shutterstock.
I searched for therapy-related and chose one that looked the most professional.
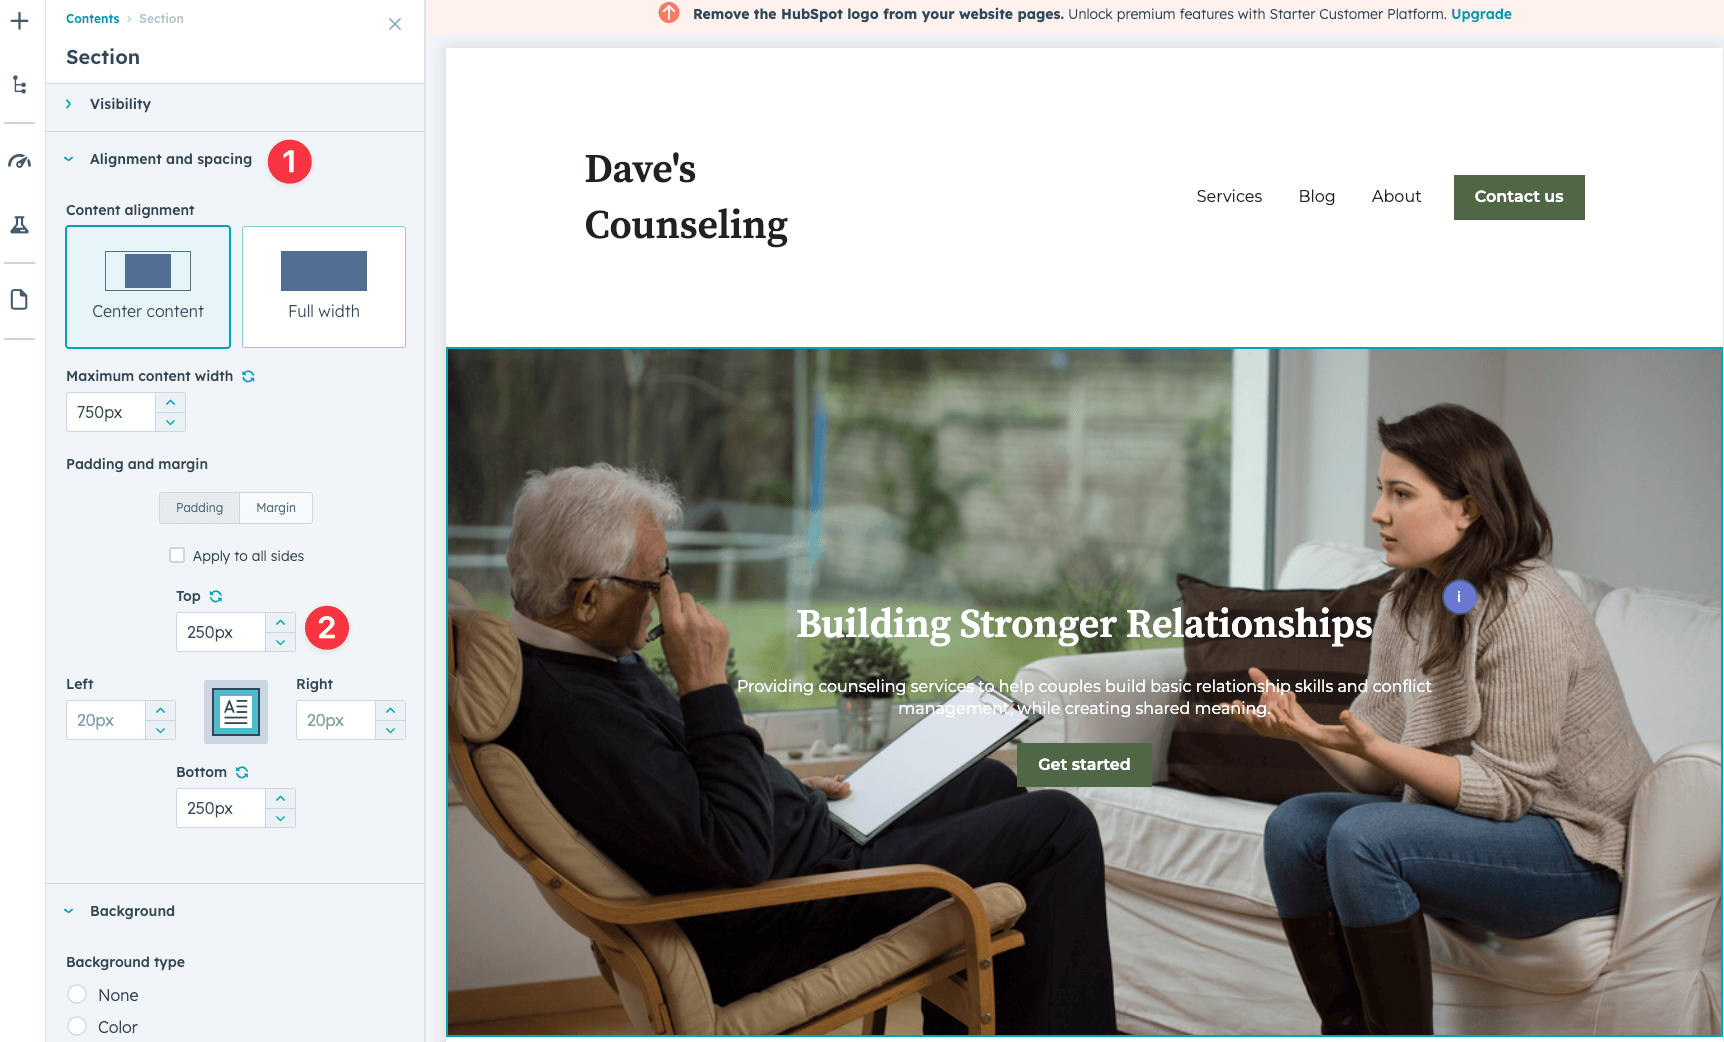
You can also tweak the alignment and spacing of the hero image for aesthetic purposes.
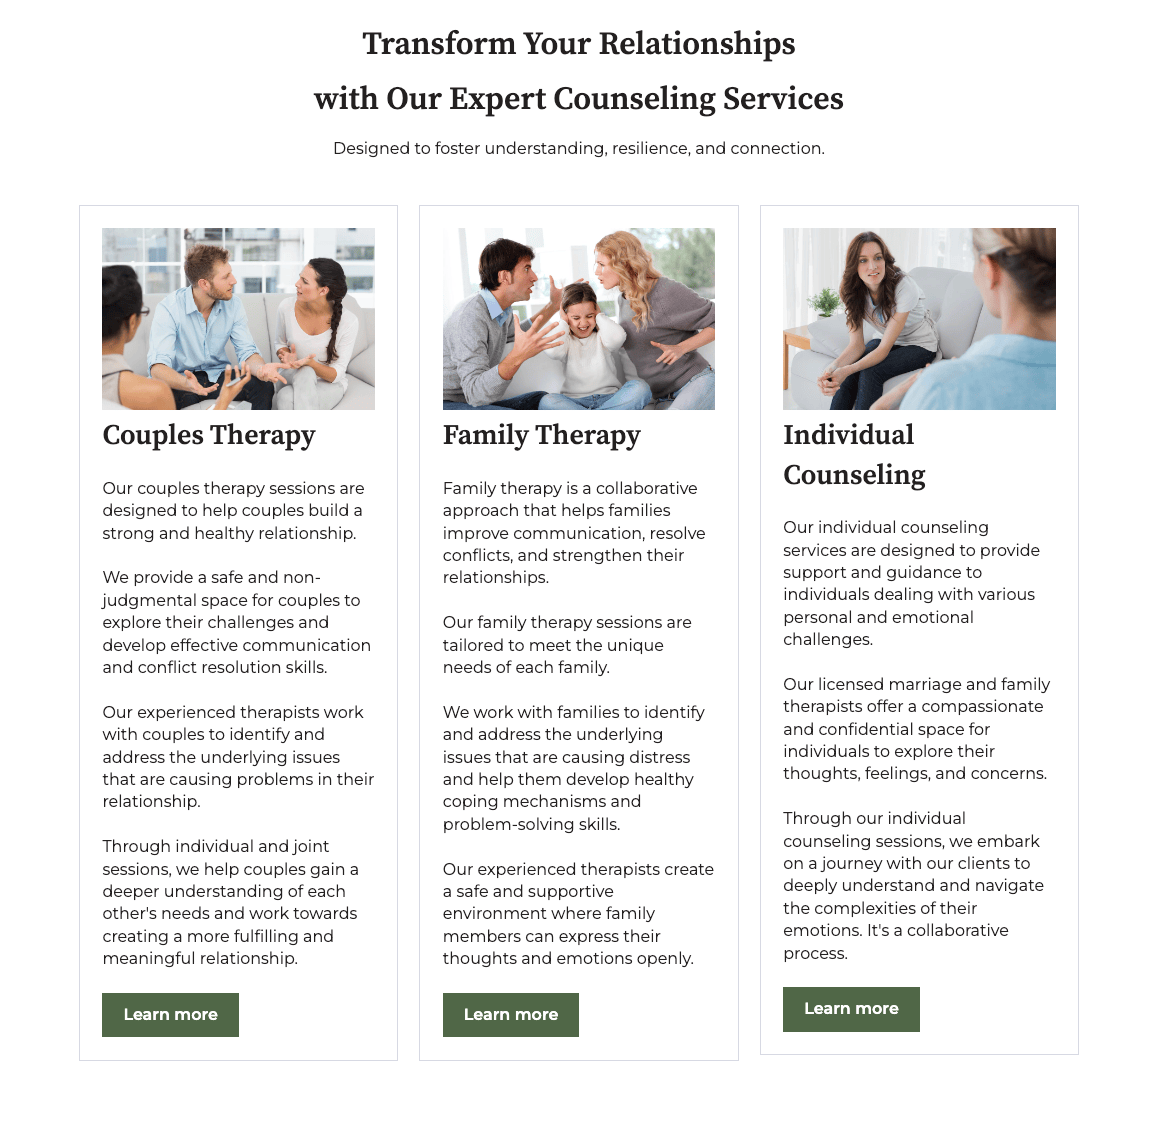
Now, you can easily replace the rest of the images on the page using the same method:
We're going to add a simple introduction section to personalize the homepage.
This is a great opportunity to highlight a common issue people seek therapy for, helping you make a strong first impression on potential clients.
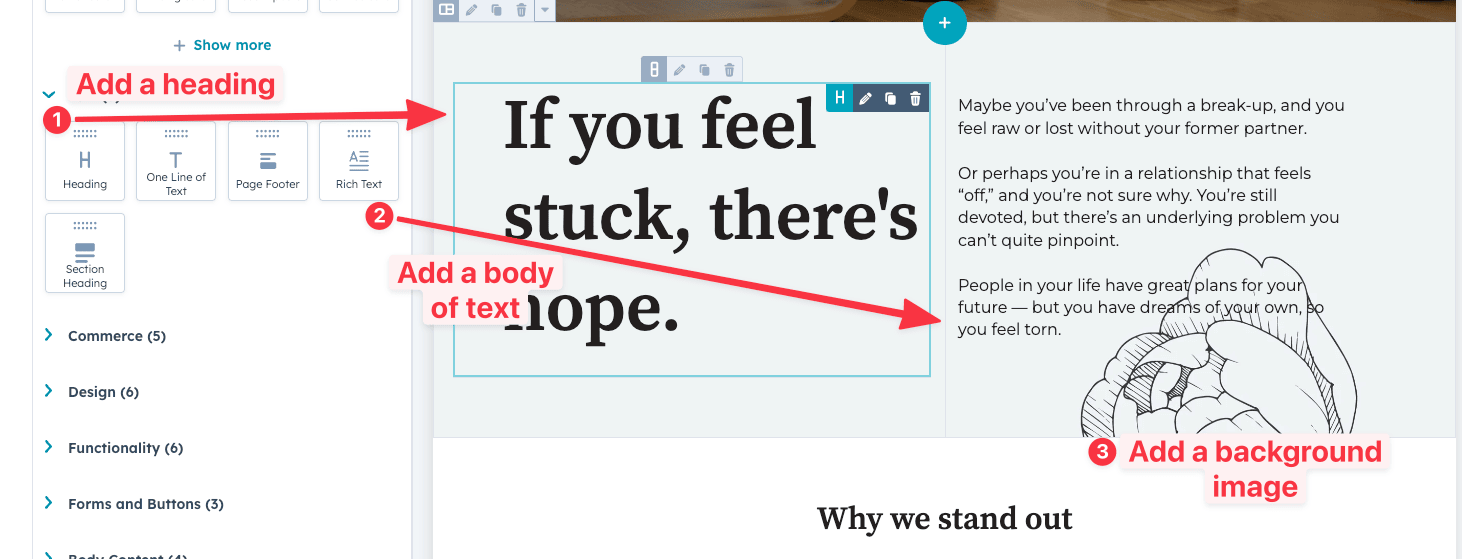
Start by clicking the "+" in the top corner and select the module you want to insert.
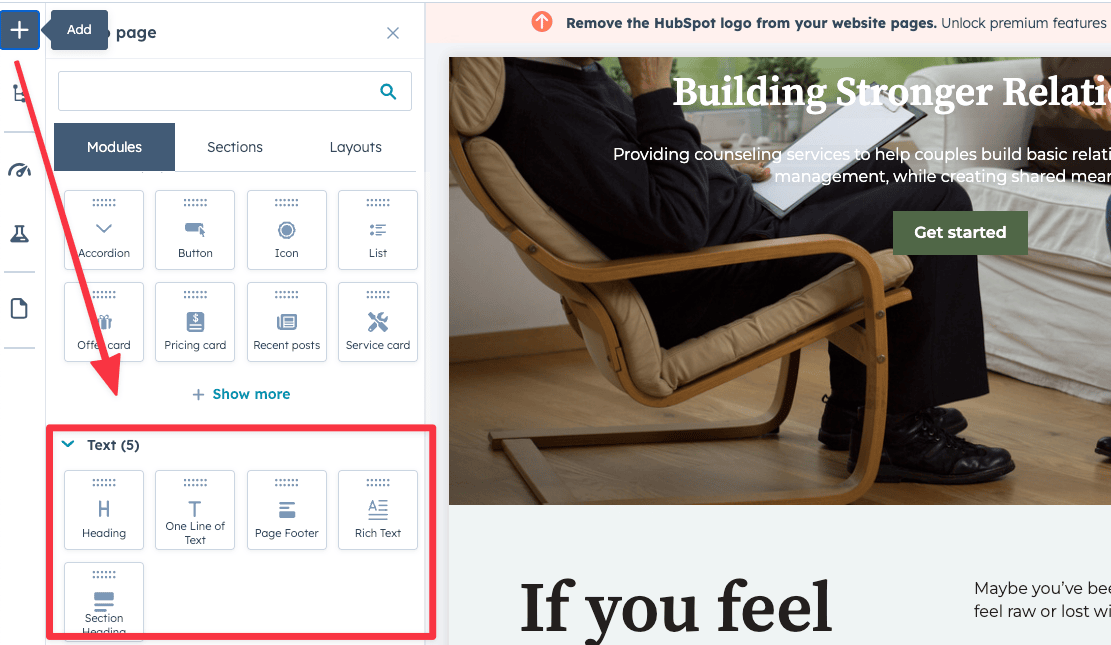
For the introduction section, we'll add a headline and a body of text. We can easily add a background image for the section later.
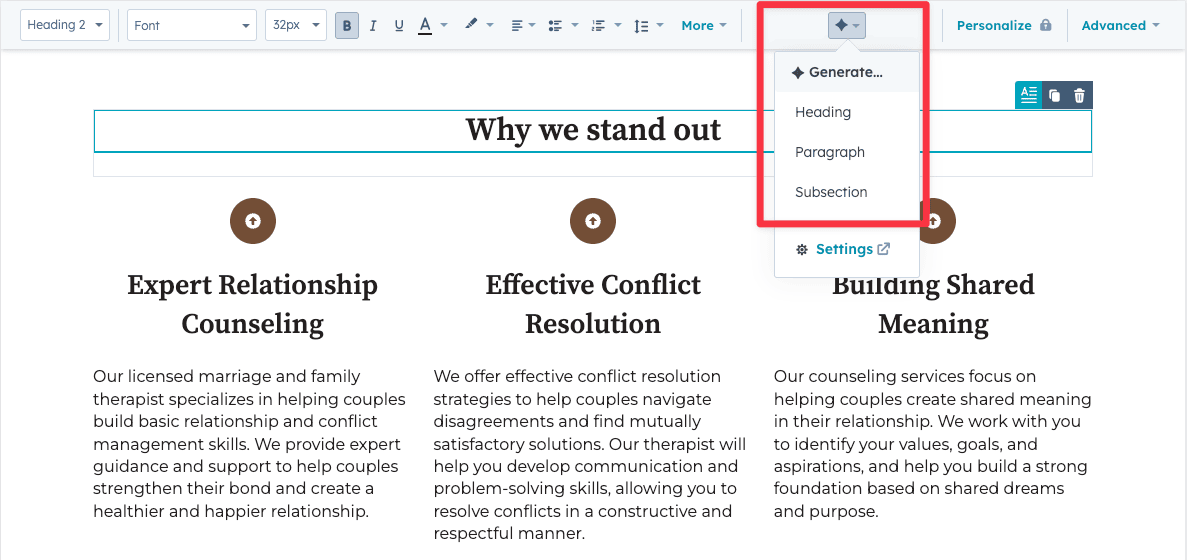
Next, we'll use HubSpot's AI content assistant (Breeze) to improve the copy for the Unique Selling Point (USP) and services sections.
To get started, select the section headline, click on the ✦ icon in the toolbar, and choose "Heading." Then, describe what you want the AI to come up with for the headline, and hit "Generate." The AI will create new copy based on your input.
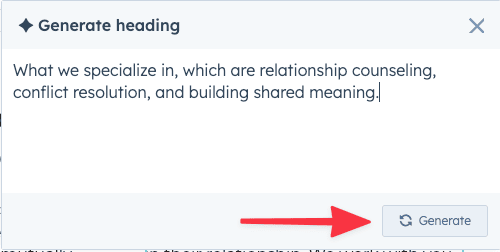
If you're not happy with what it generates, you can always regenerate the copy again. But in this case, I'm satisfied with the heading, so I'll stick with it.
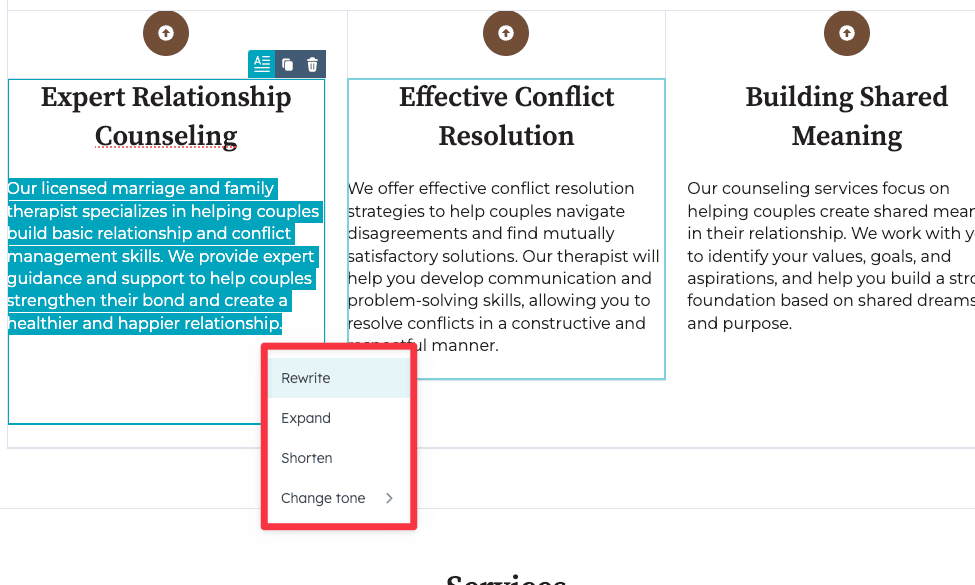
Another way to use the AI content assistant is to highlight any text on the page and click the ✦ icon next to it. This is handy if you've got some content already and just want to tweak it. You can:
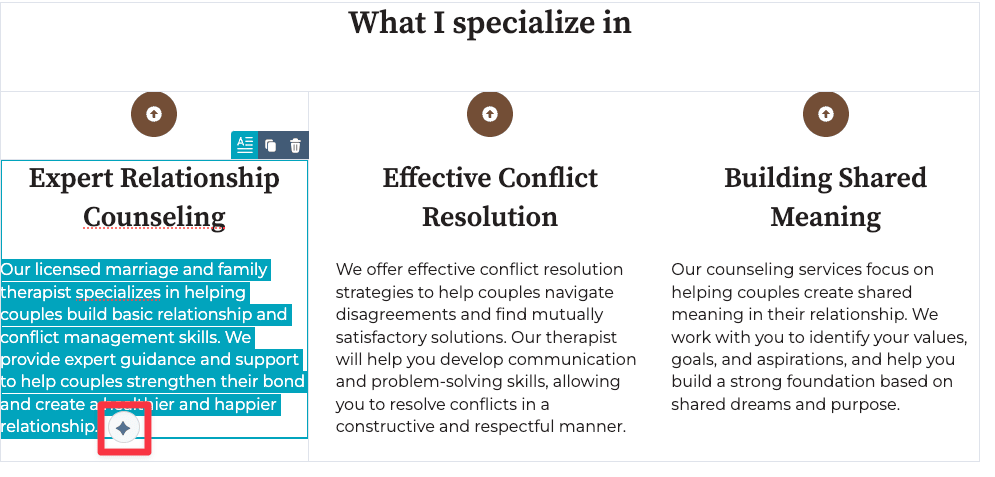
Here's the updated copy for the section with improved formatting.
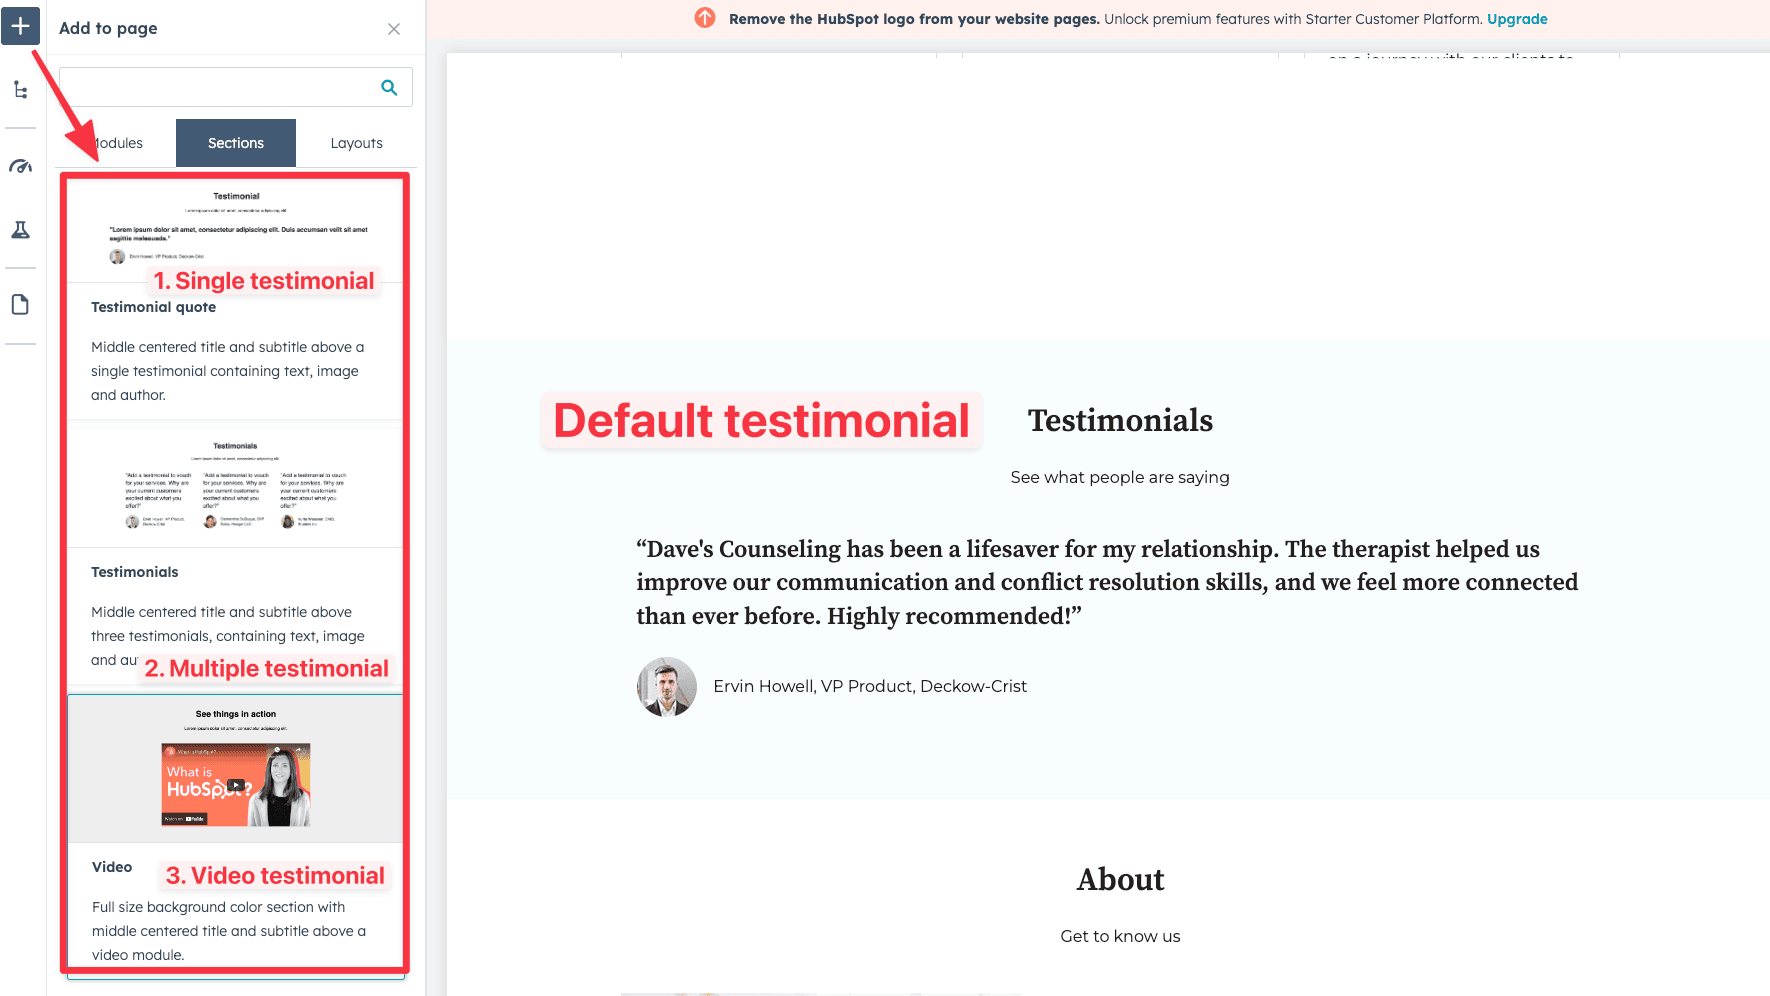
The AI generator gives you a default testimonial that includes the client's text and image as a single block.
If you want to add more testimonials, just click the "+" button in the top corner and check out the different options.
You can choose a pre-made section with multiple testimonials or add them one by one if you have more.
There's also an option to include video testimonials—you can find all of these under the "Sections" tab in the editor.
Let's wrap up the homepage by finishing the contact section. I used the AI content assistant to come up with a better title since the default one was too generic.
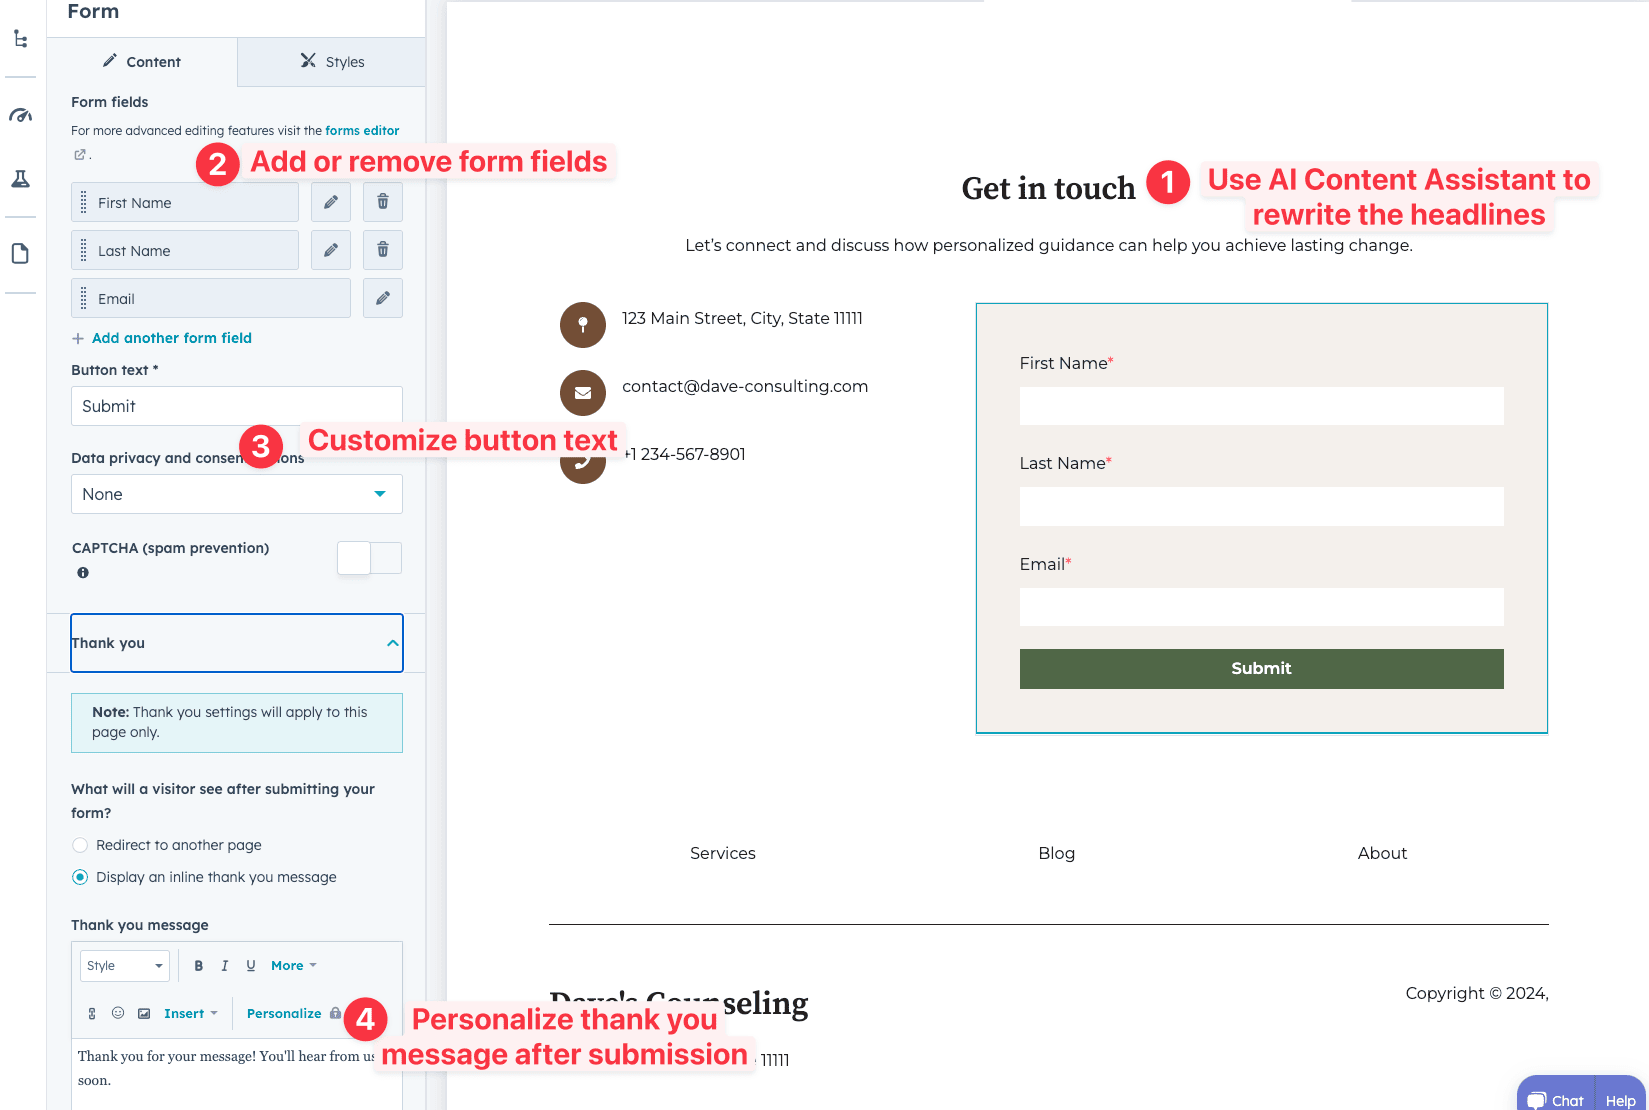
When you click on the contact form, you'll see options in the sidebar to customize it. You can tweak all the text and add or remove any fields you need to gather the right info.
You can also personalize the thank-you message that appears after someone submits an inquiry.
And lastly, you can set up automated email follow-ups (we'll dive into that later) to help set expectations and start building a connection with your potential clients.
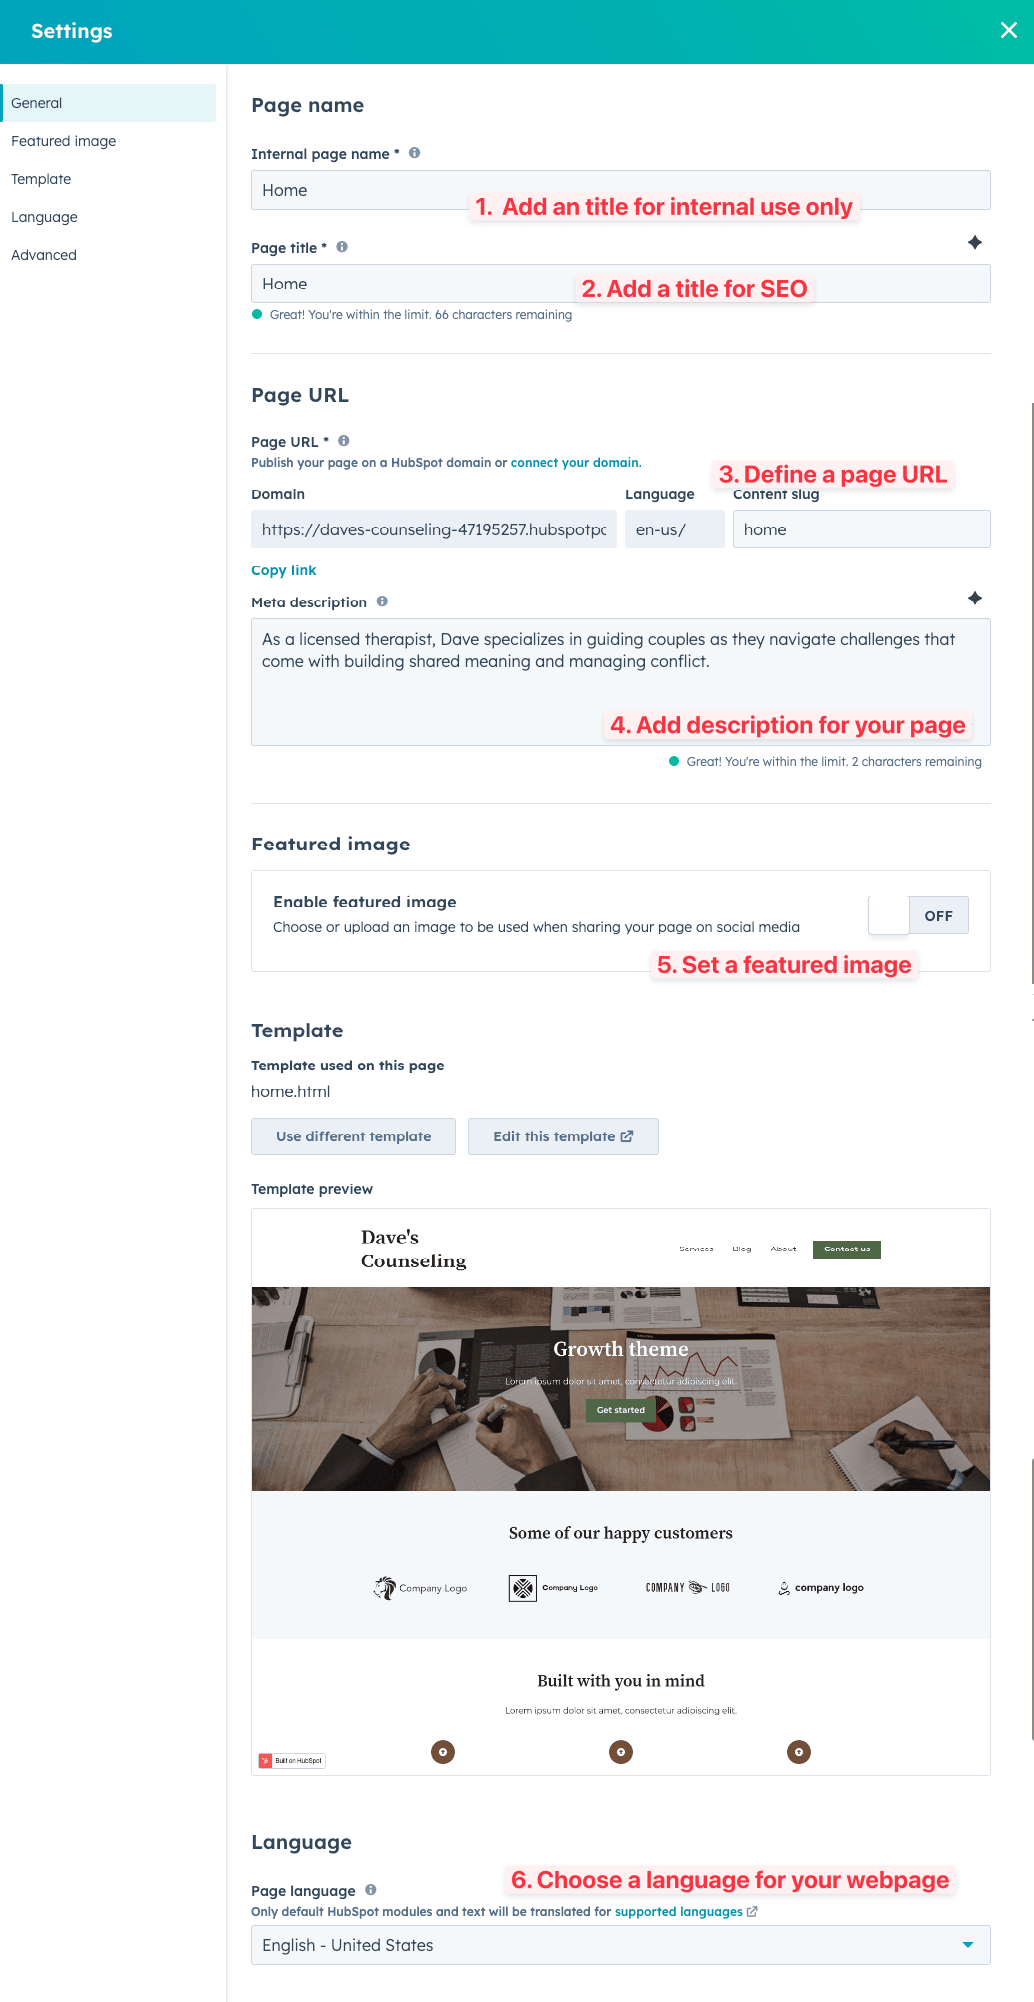
The page settings is where you add your page details.
Using the AI website generator will automatically update your page settings, but it's a good idea to double-check them for any errors.
If you create additional pages, you'll need to update the settings manually; otherwise, you won't be able to publish the page (more on that later).
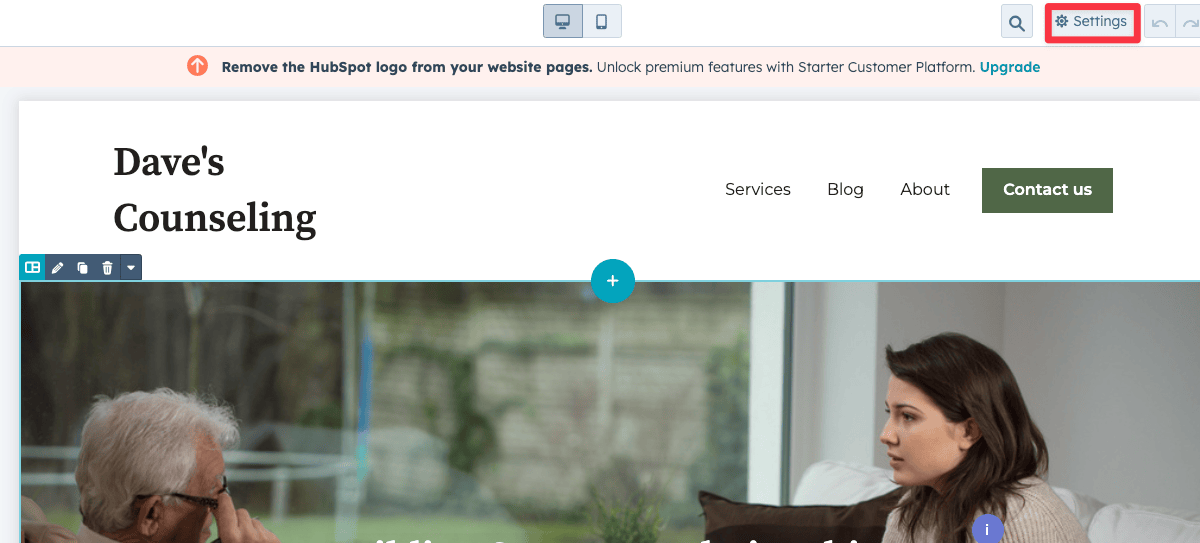
To access the settings for the homepage, click on the ⚙️ icon in the top corner.

Make sure these fields are filled and optimized:
The last step before finalizing your home page is to check how it looks on mobile and desktop.
When you first create the page with the AI generator, Hubspot automatically generates a mobile version of your website.
You use this toggle at the top of the website editor to view how your page looks on mobile and desktop.
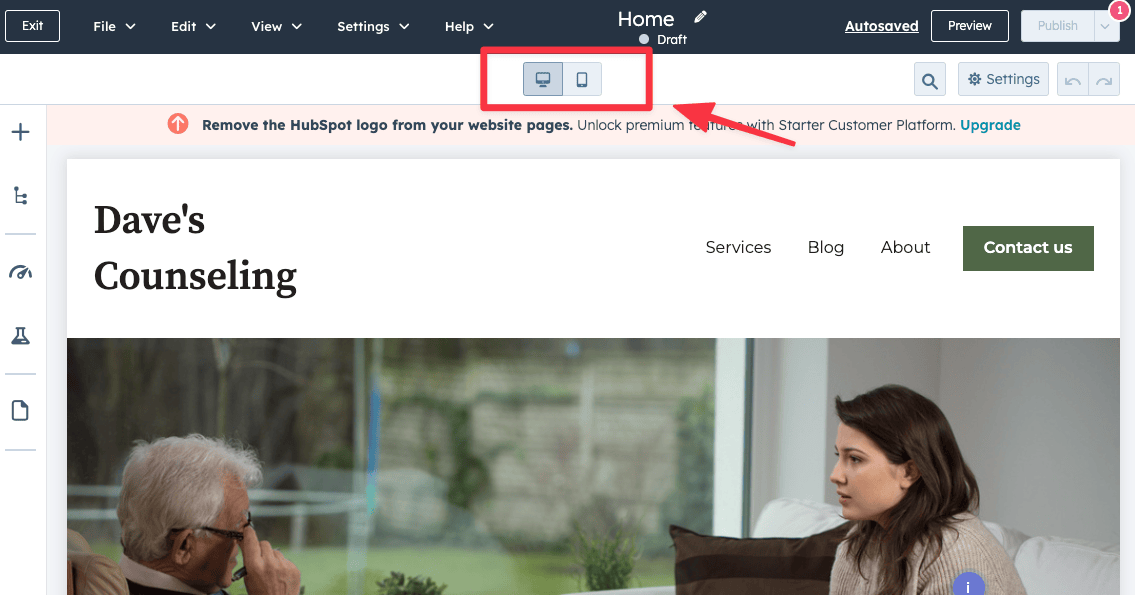
A few key things to check for:
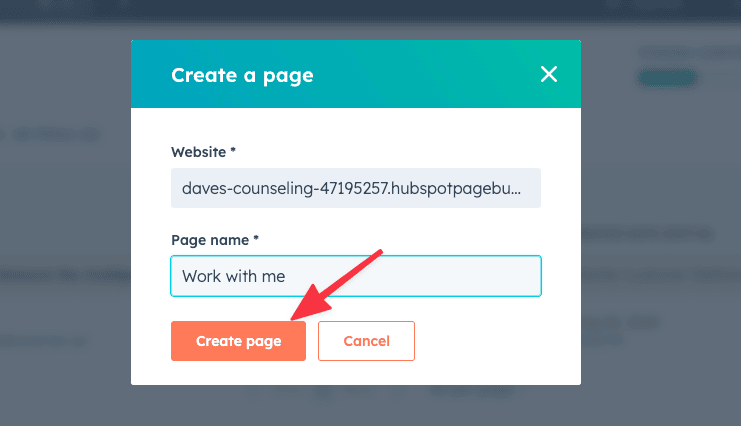
So far, we've only created the home page, but there are other essential pages you could add to your consulting website, for example:
To add these pages, follow these steps:
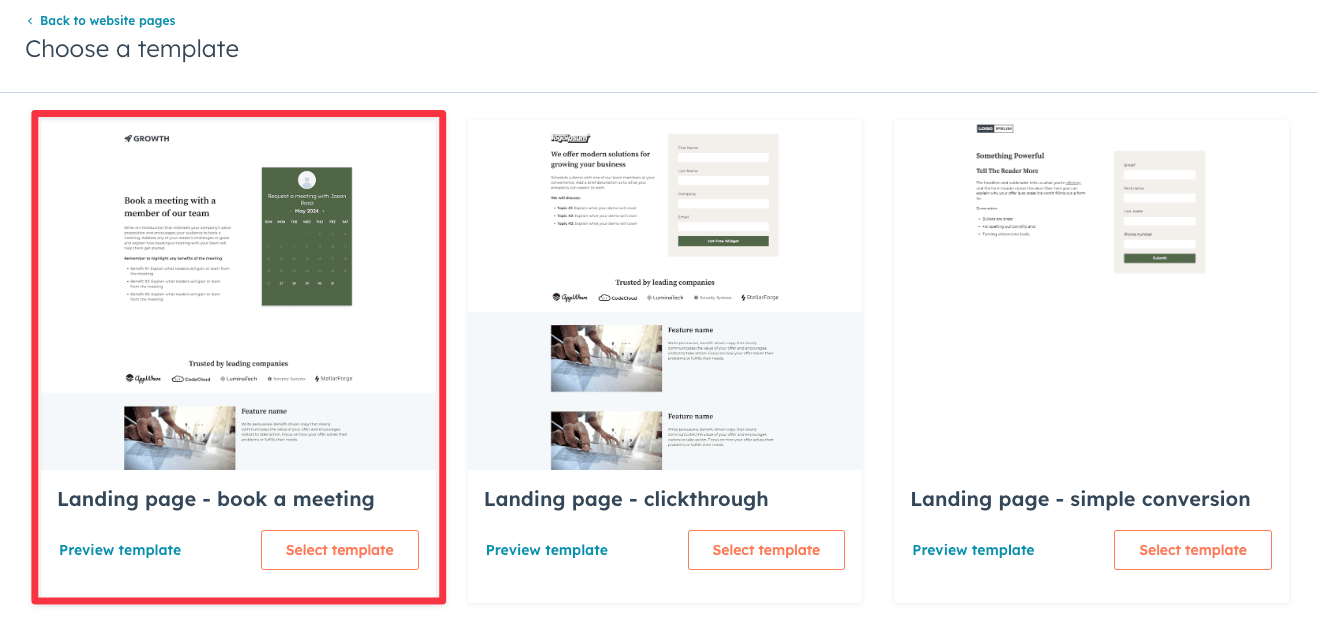
After setting up your contact page, I recommend adding the other important pages mentioned above.
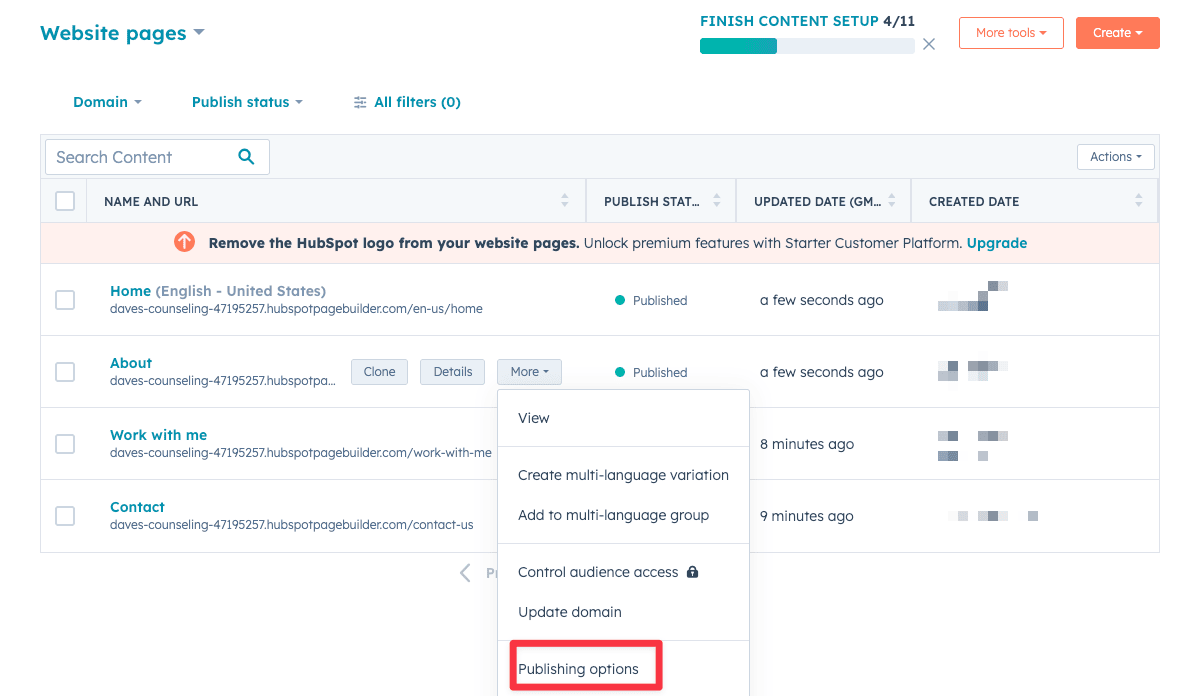
Important: Make sure to update the page settings AND double-check the page on mobile just as you did with the home page.
When you're done, go ahead and publish those pages by clicking More ➝ Publishing options ➝ Publish.
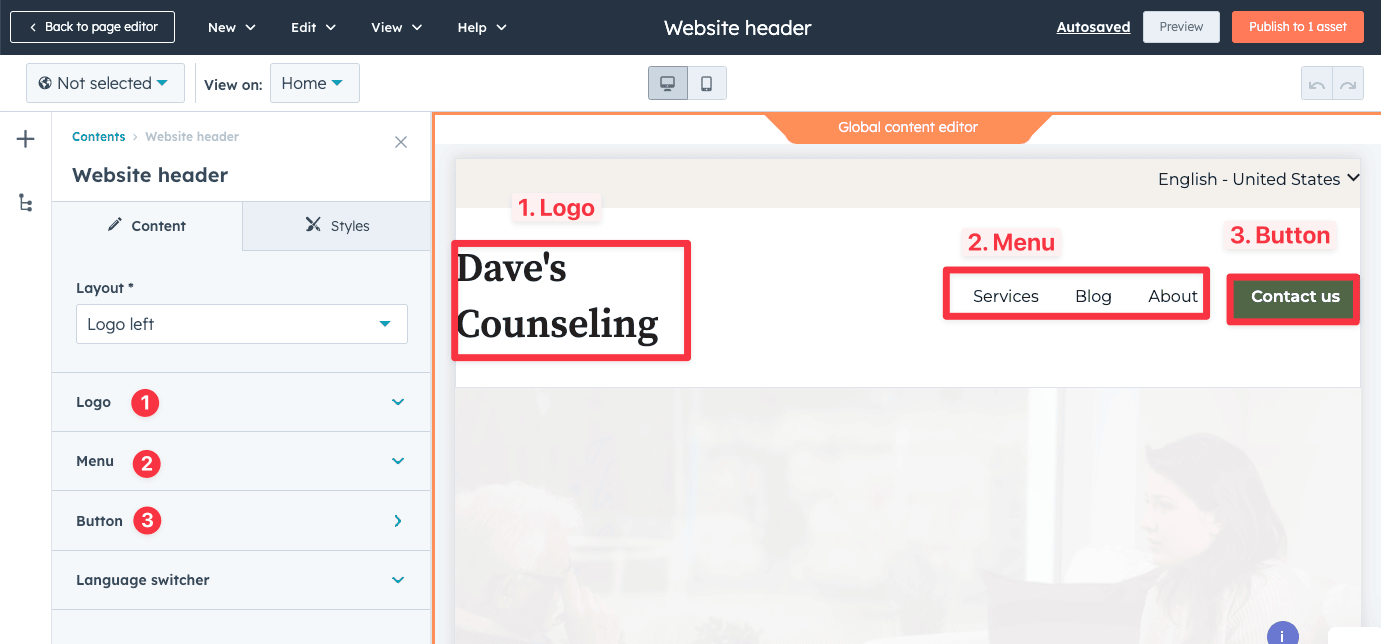
Once you've added all the essential pages, you want to edit the website header and footer.
Changes to the header and footer will affect all pages you've created because they use the same header and footer across the site.
In HubSpot, these sections are referred to as "global content."
Once you've opened up the Global Content Editor, you can:
Similarly, you can customize the Footer by adding more navigational links, updating your company details, logo, etc.
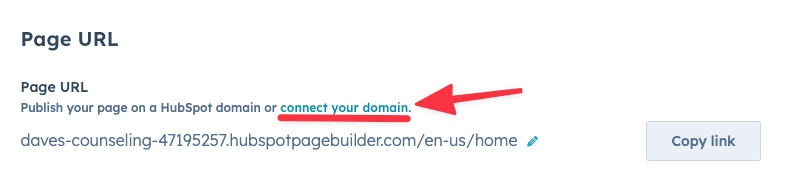
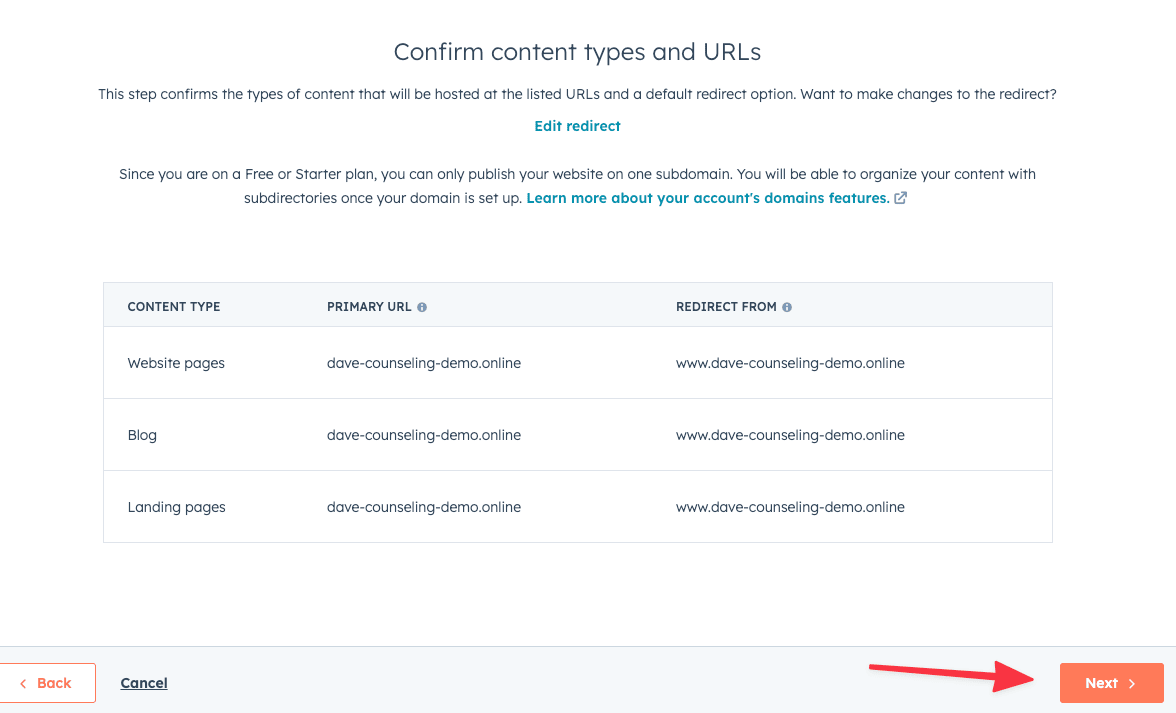
The last step before your website is ready is to connect it to a custom domain.
You can purchase a domain from your favorite domain registrar (I usually go with Namecheap) and then connect it to HubSpot.
I've also put together a guide on how you can get a custom domain for free if you want to check that out.
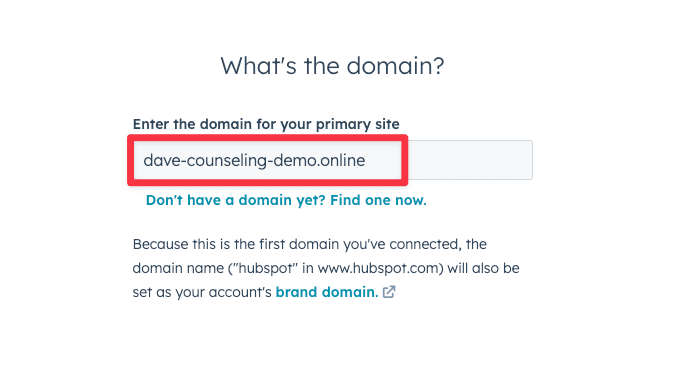
To connect a custom domain to your Hubspot site:
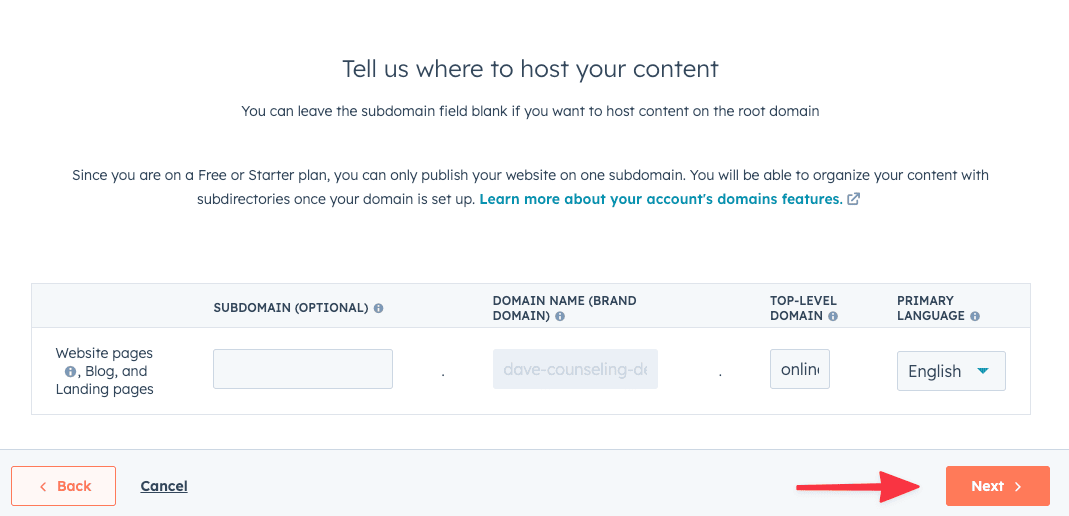
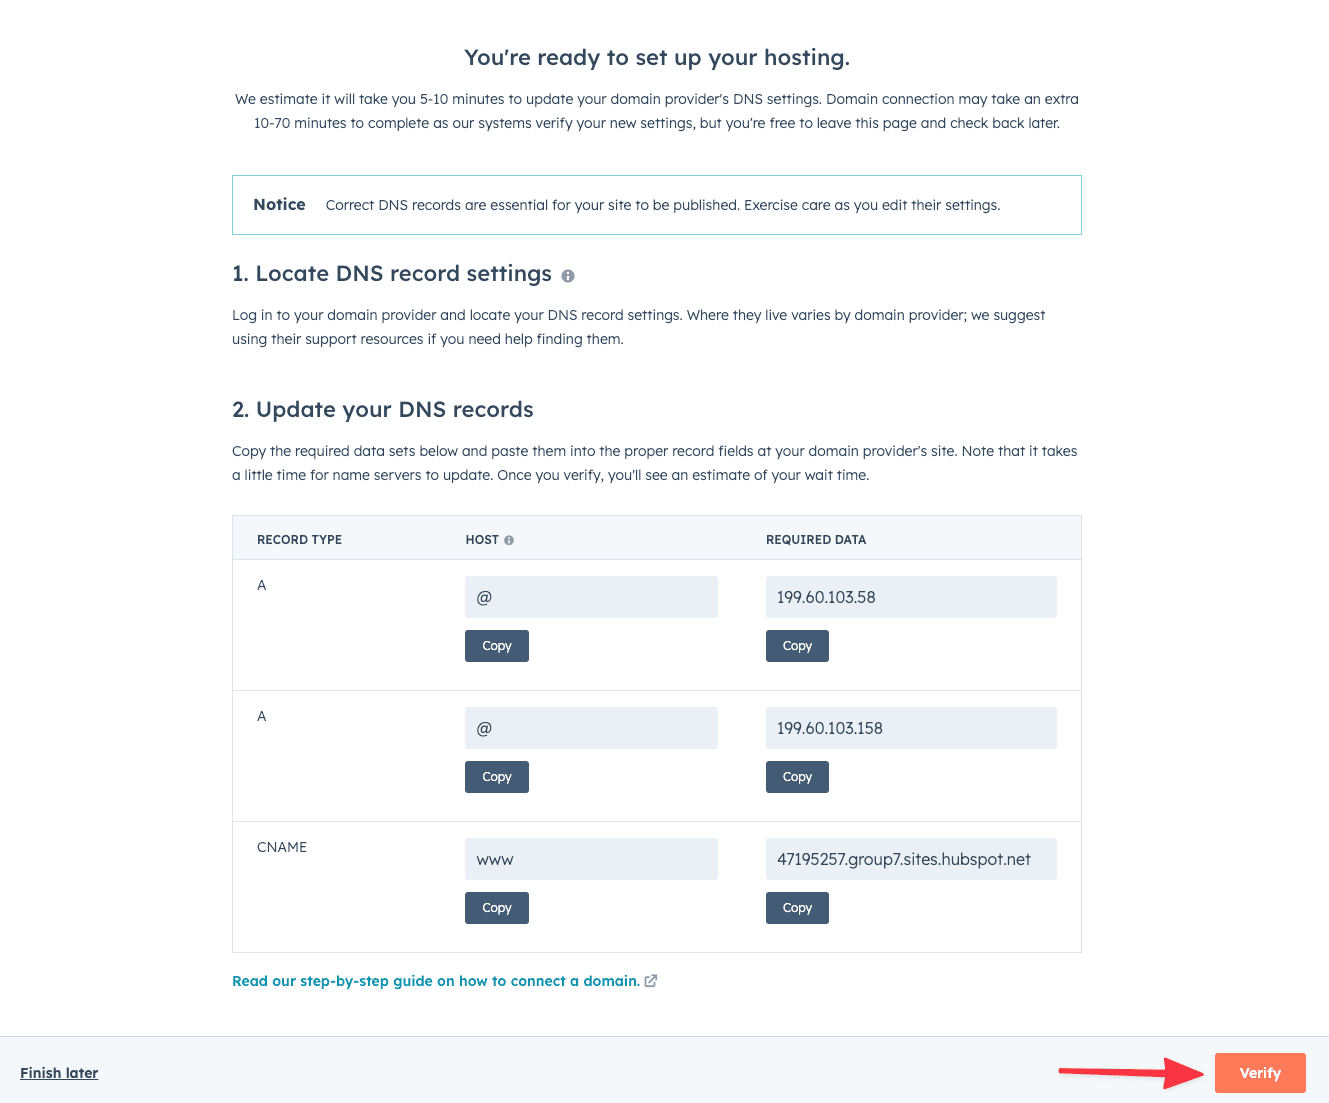
By updating these DNS records, you're instructing your registrar to direct users to HubSpot, ensuring your website loads when visitors enter your domain.
If you're unsure how to add the DNS record, Hubspot has a step-by-step guide on their official documentation.
That's it! You've now created a fully functioning website using Hubspot's latest AI website generator.
Yes, HubSpot offers a free plan that includes access to its AI website generator. However, some advanced features and customization options may require a paid plan.
Click here to see all the features included in the free plan.
Not necessarily. The HubSpot AI website generator is designed for users with little to no technical skills. The AI assists in creating your website by guiding you through the process, making it accessible for beginners.
Yes, HubSpot allows you to connect a custom domain to your website, even on the free plan. You can either purchase a domain through HubSpot or connect one you already own.
You can build various types of websites, including blogs, landing pages, business websites, and portfolio sites.
The AI generator provides templates (along with third party templates from Themeforest) and customization options suitable for different industries and purposes.
While the AI generates a website based on your inputs, you can still customize various aspects, including the layout, colors, fonts, and content.
That said, you can't customize every single element of your site like other website builder like Wix or Webflow. HubSpot provides a pre-defined set of customizations for you to customize your site.
The time it takes depends on how detailed you want your website to be. But the AI can generate a basic website within minutes with your input, but additional customization and content creation may take longer.
The demo website took me approximately 1 hour to create a 4-page website.
Yes, HubSpot's platform offers various tools like forms, chatbots, ad retargeting, email marketing, and way more. Most of these are included in the free plan and then some.
Again, you can check here for the full list of marketing tools included in the Hubspot's free plan.
David Nge is the founder and writer behind MakingThatWebsite.com. Since launching in 2021, he’s been on a mission to help non-techies—especially small business owners—build better websites using easy-to-learn tools and smart, time-saving strategies. He specializes in website builders, SEO, and practical AI tutorials for small business owners.
Have a tutorial you want to learn? Leave a suggestion here.